
Every Journey Begins Somewhere!
This is a guide to give you everything you need to begin your journey into sewing with quality tools, skills, and knowledge.


Everything You Need To Start Sewing
- Overview
- Basic Sewing Vocabulary
- Essential Sewing Materials
- Optional Sewing Materials
- Setting Up Your Sewing Space
- Essential Sewing Skills
- Putting It All Together
Overview
Welcome to your amazing sewing journey!
Sewing may be my favorite hobby, and I have a lot of hobbies! The soothing, rhythmic sound of the sewing machine, the crisp and precise cut of the scissors, and the feeling of different fabric textures is wonderful. It is a satisfying hobby while you are doing it, but you also get to use the results! Nothing beats wearing a soft, well-fitted piece of clothing that you made yourself. I love getting compliments on my clothes and getting to say, “Thank you, I made it myself!”
I’m so glad you’ve decided to join me on this journey. Anyone can learn to sew, but I also know it can be daunting when you first start. That’s why I’ve made this comprehensive guide to beginning basic sewing. I’ve included materials you’ll need to buy, where to get them for different prices, and basic sewing techniques and vocabulary that you will need on this journey. Have some patience for yourself and have some fun, and you’ll be seeing results you love before you know it!
Basic Sewing Vocabulary
Sewing – Attaching pieces of fabric together using thread and needles.
Sewing Machine – A machine that makes sewing much faster. Usually operated using a foot pedal, like a car.
Thread – Thread is fibers spun together into a long string and threaded around a spool or bobbin. Made out of natural fibers like cotton or artificial fibers like polyester.
Notions – All small accessories needed to complete a project, such as buttons, zippers, hooks, laces, and elastic.
Presser Foot – The presser foot is the metal or plastic foot that holds the fabric while you sew. It lifts and drops as the machine sews. There are many different kinds of presser feet, and they can be removed and replaced.
Spool – The cylinder that thread comes on, with a hole through it for mounting on the sewing machine’s spool pin.
Spool Pin – A pin that the spool is placed on the sewing machine. A cap are used to prevent the spool from coming off. It is usually on top of the machine.
Bobbin – A small, often clear, plastic spool that is used by the sewing machine for the bottom stitches. It usually fits into the machine underneath the presser foot. Most machines have a function to help fill the bobbins with thread from the spool for you.
Feed Dogs – These are the teeth underneath the presser foot that move the project through the machine as you sew. They can be lowered if necessary, although most projects need them raised into their normal position.
Grainline – The direction that the threads of fabric face, parallel to the selvedge or sides of the fabric. Patterns usually show which direction they need to face with a large, double-sided arrow. Place patterns so that the arrow is parallel to the sides of the fabric.
Bias – Bias refers to the diagonal direction of the fabric. Some patterns are cut on the bias because doing so gives them some stretch. This is commonly seen in bias binding.
Bias Binding – Narrow strips of fabric cut on the bias that are used to finish the edges of projects, such as necklines, arm holes, and hems.
Seam – A connection between two pieces of fabric.
Seam Allowance – The amount of fabric that is left between the edge of the fabric and the seam. Also refers to the distance you want to sew from the fabric edge. The most common seam allowances I’ve seen and use are ½ inch, 1 cm, and ⅝ inch. Most sewing machines have lines next to the presser foot that show you where to line up the fabric’s edge for various seam allowances.
Right and Wrong Side – Fabric usually has a right and wrong side. The right side is the side with the pattern you want to see in the finished project. Sewing patterns give instructions like “right sides together”, which means that you place both fabric’s patterned sides together before sewing.
Selvedge – The selvedge is the long ends of fabric that finished in a way that keeps it from unravelling. They are the edges that are on the top and bottom of fabric bolts, not the edge that has been cut.
Woven Fabric – Woven fabric has little to no stretch. Most cotton fabrics, quilting fabrics, and apparel fabrics are woven. Woven fabrics will unravel along unfinished edges.
Knit Fabric – Knit fabric is stretchy and often softer than woven fabrics. They will not unravel along unfinished edges. They are often considered more difficult to sew with than woven fabrics, as the stretchiness makes stitches wonky and fragile.
Nap – Nap is the surface of fabrics that have long fibers, such as corduroy, velvet, and faux fur. The direction of nap on fabrics is important when cutting out patterns on fabric that have nap.
Interfacing – Interfacing is a type of fabric that is usually thin and white. It is either sewn or ironed onto the wrong side of fabric to give it more structure.
Backstitch – This is a stitching technique where you sew back and forth a few times in the same place. It anchors the ends of the thread into the project.
Notch – Most sewing patterns have notches drawn on them to make lining up pieces easier after they are cut out. They are often depicted as small triangles on the edges of pattern pieces.
Baste – Basting stitches are very long stitches. They are used for temporarily attaching fabric. This technique makes it much easier to check the connection and then remove unwanted stitches later. They can also be used to gather fabric.
Gathering – Gathering stitches are very long stitches used to gather fabric. The long stitches allow you to slide the fabric along the thread. This creates gathers, or bunches of fabric, which are commonly used in skirts and sometimes used in other projects.
Dart – This is a technique for altering the fit of a piece of clothing before it has been constructed. Darts are triangles of fabric folded and stitched into pattern pieces, usually dress bodices, shirts, and pant waists.
Hem – The hem is the finished bottom edge of a garment, such as a skirt or pants. Can refer to finishing the edge or changing the hem to create a better fit.
Press – To press is to hold a hot iron onto a fold to create a permanent crease. It is a very helpful technique for making clean, straight seams and folds.
Iron – To iron is to move a hot iron across fabric to take wrinkles out of it. Make sure your iron is on the right setting for the fabric you use. Too hot and you might burn or melt it!
Essential Sewing Materials
The materials listed below are what I consider essential for machine sewing clothing. I’ve included various brand and purchasing options so that you can get started without an outrageous amount of money!
- Sewing Machine
A quick note before the sewing machine analysis:
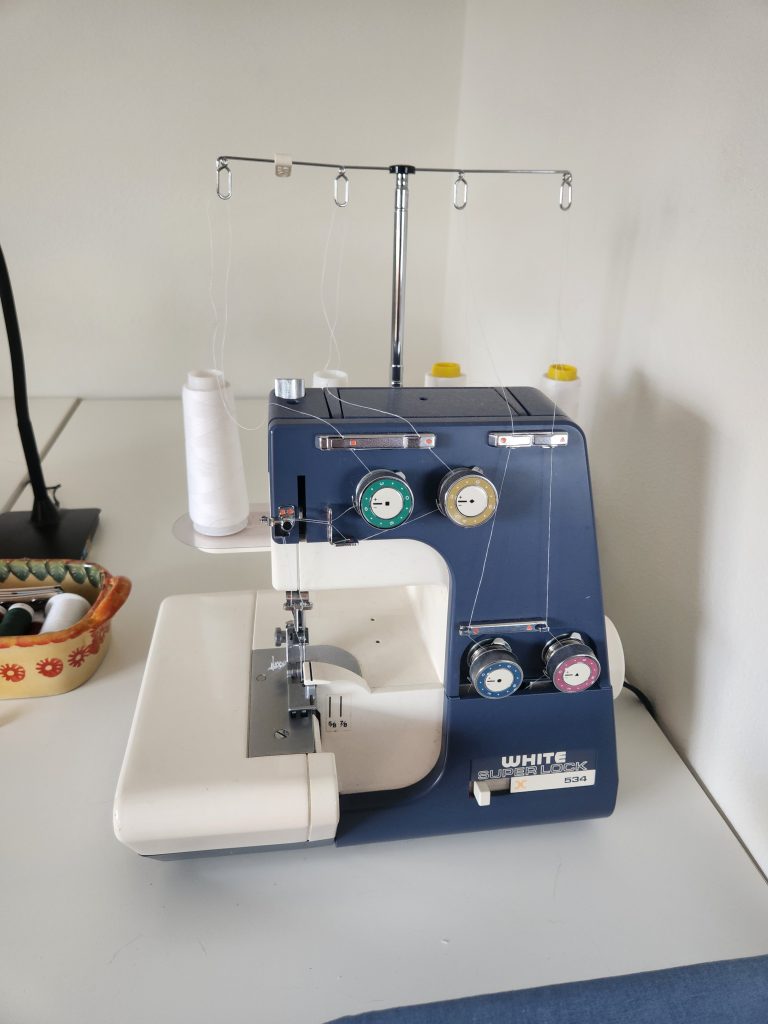
You need a sewing machine, not a serger or overlocker. Sewing machines are made to construct garments, accessories, and quilts. Sergers or overlockers are made specifically to finish seams by wrapping the edge of the fabric in thread to keep it from unravelling. You can tell a machine is a serger if it has four big cones of thread and a wire “tree” in the back to hold the threads. You can also get a serger if you want to, but the sewing machine is what you need to begin!

Of course, you’re going to need a machine to machine sew! Before I got started sewing, I did a lot of research on what machine would be best for me and came up with a list of important factors:
- Sturdiness – Because new sewists are likely to be hard on their machines, it’s important that they are sturdy.
- Mechanical vs Electronic – Mechanical machines are simpler, have fewer options, tend to be sturdier, tend to be less expensive and are recommended for beginners. Electronic machines have more options and nicer features, but are less sturdy and usually more expensive.
- Number of Options – Many older machines have very few stitch options. Even less expensive newer machines often have more options. Although you don’t need much more than a straight stitch at first, you will probably want at least a zig zag stitch and maybe some stretch stitch options if you want to use stretchy fabric.
- Price – I didn’t have a lot of money when I began, so I needed something cheap enough I could afford it without being so cheap that it would break down quickly.
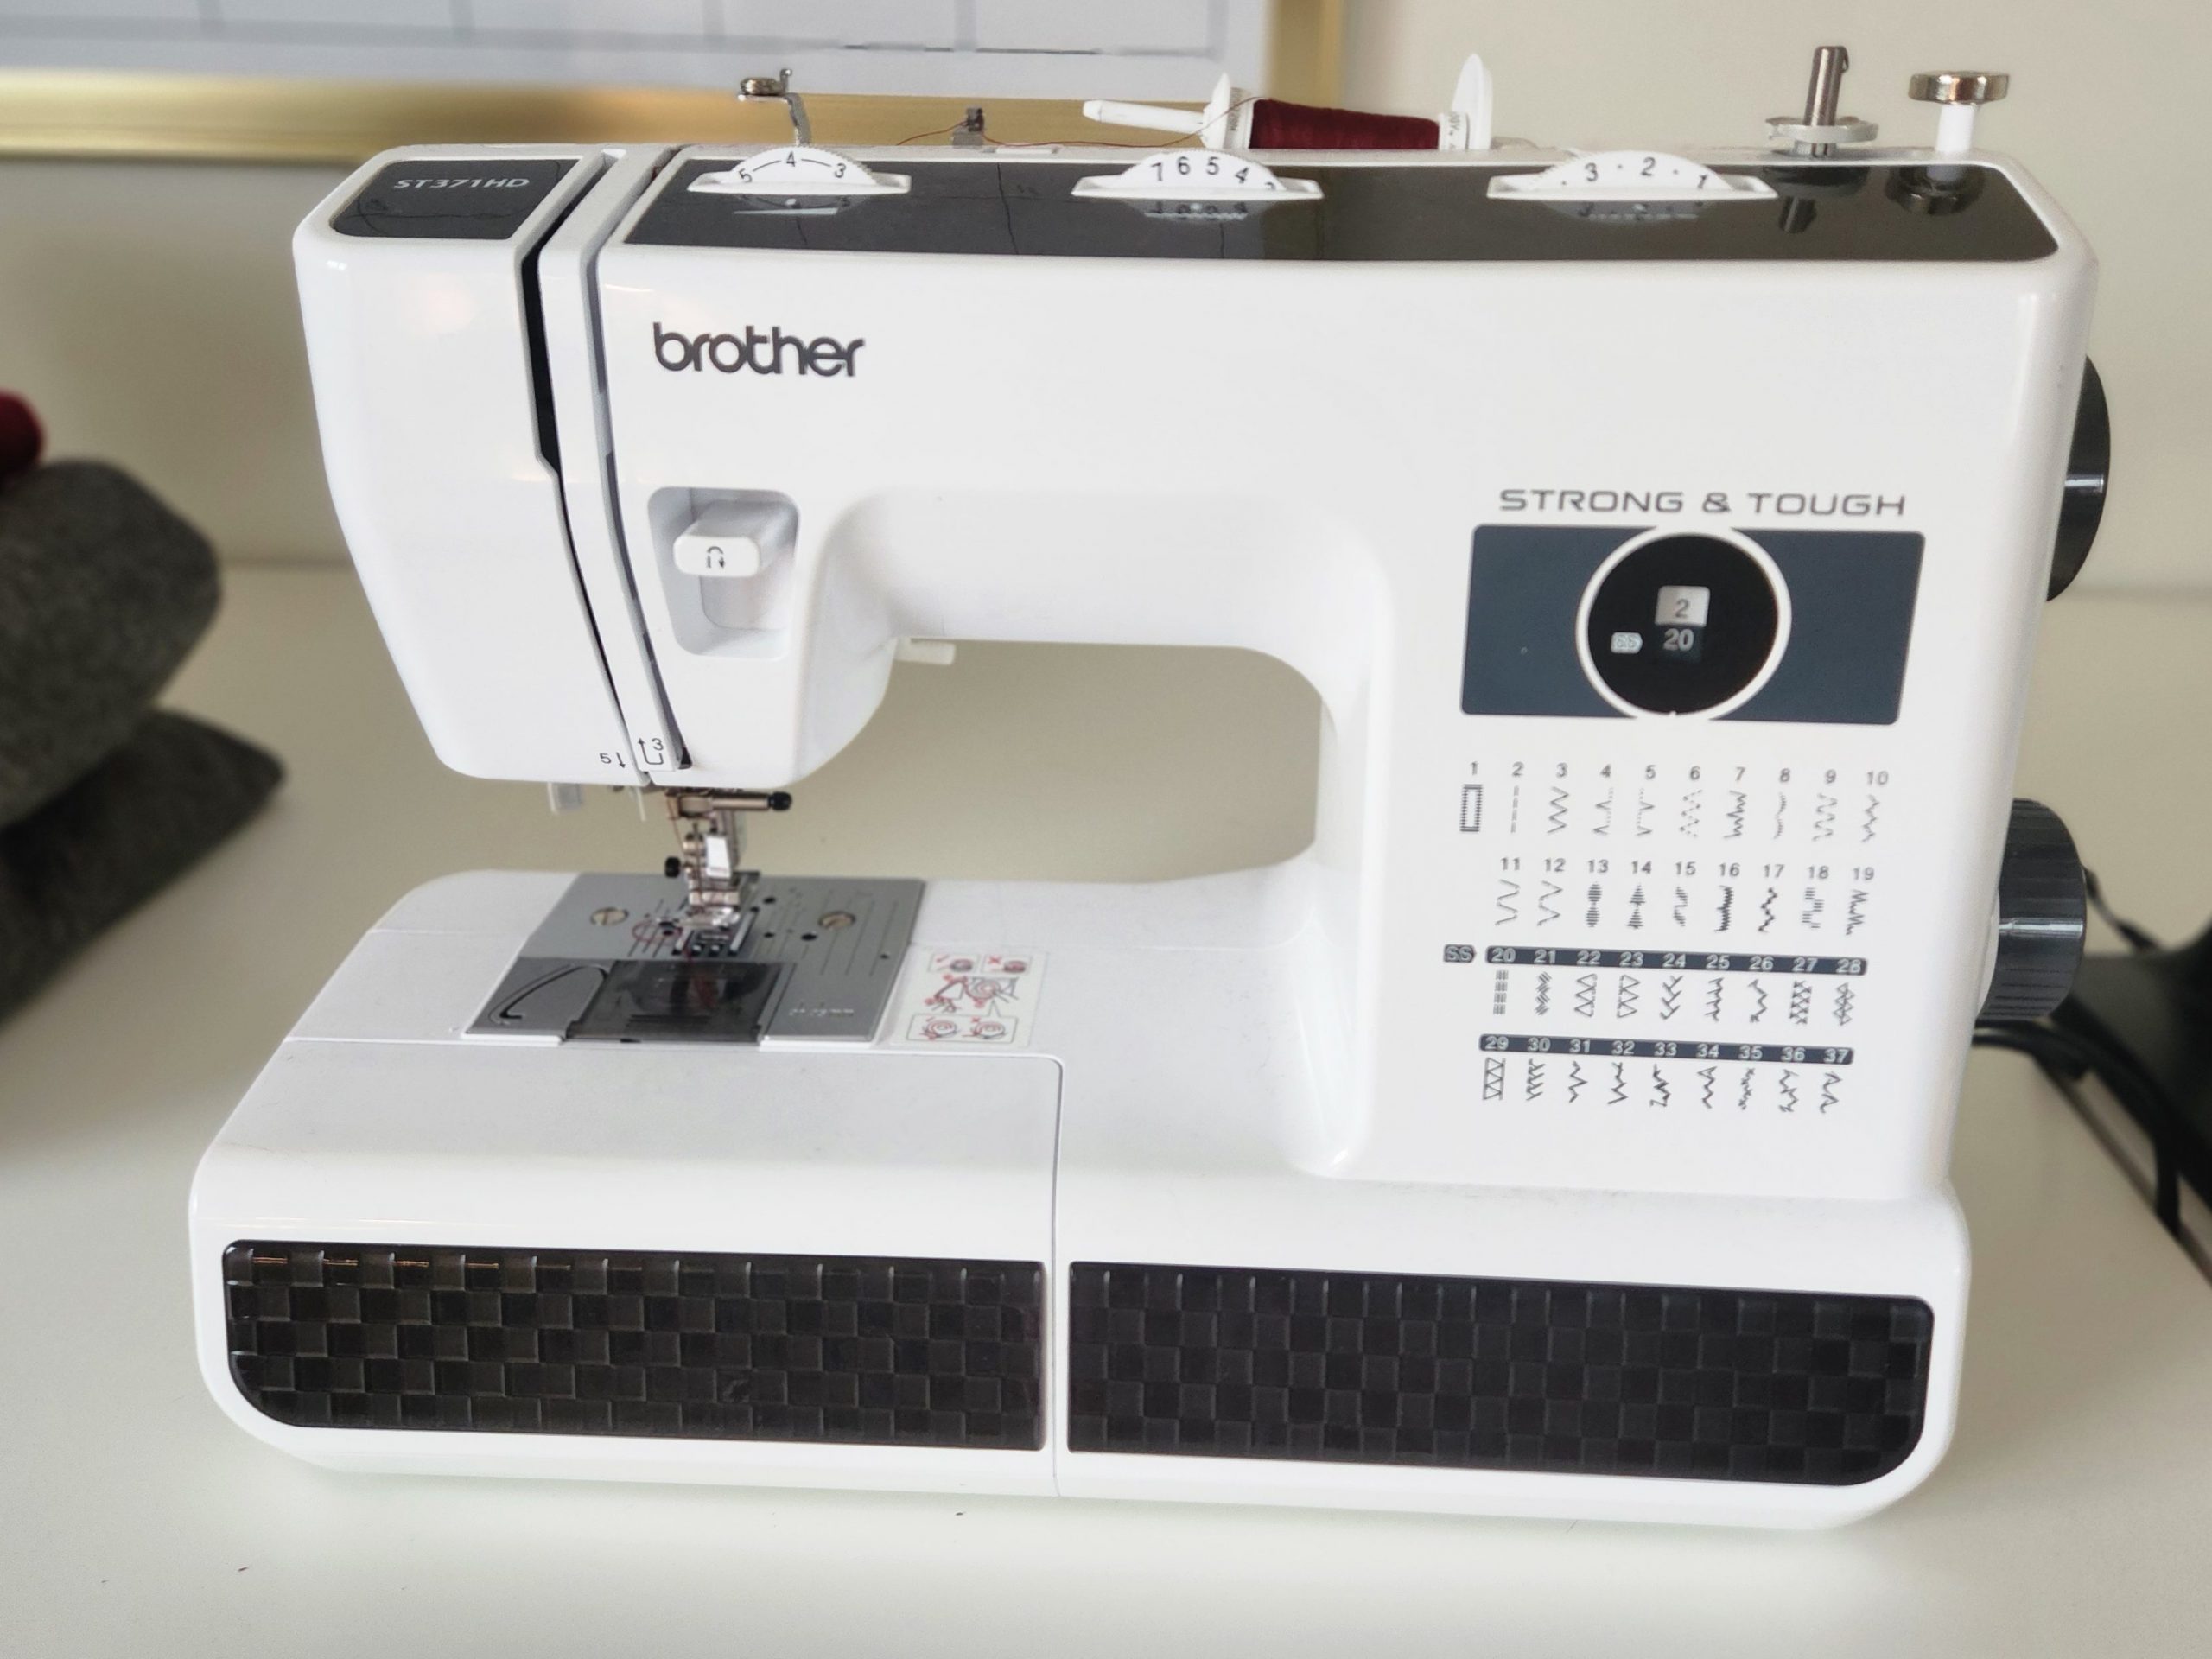
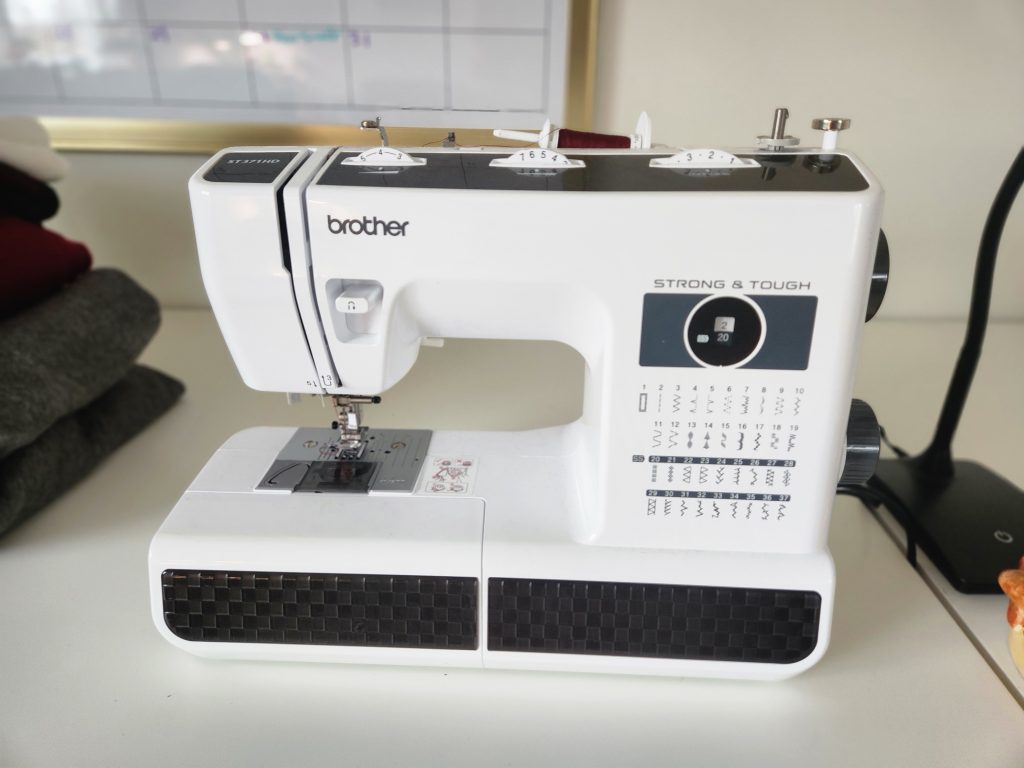
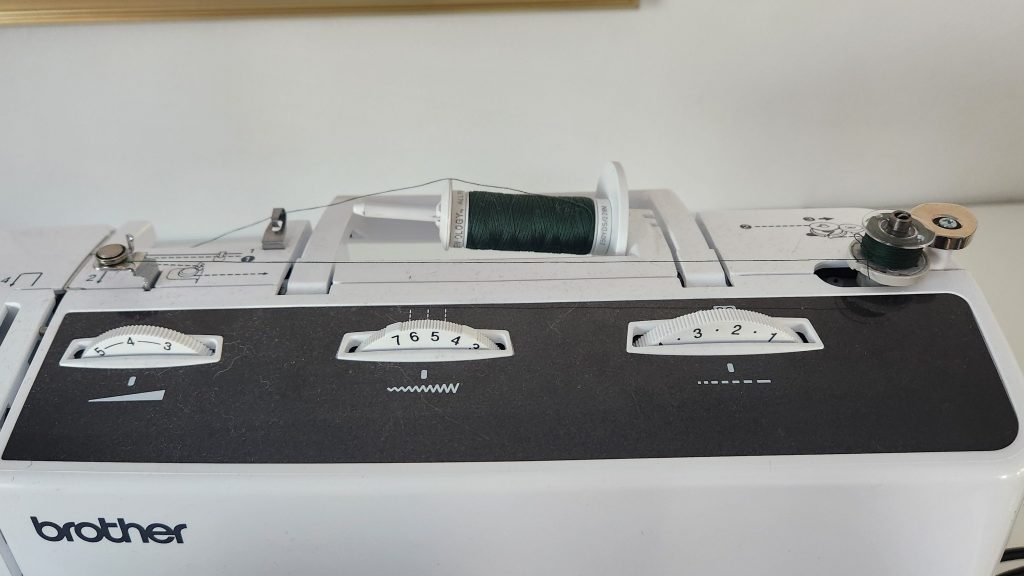
When I put all of these qualifications together, I arrived at the Brother Strong & Tough ST371HD sewing machine. Not only is it made by a trusted brand of sewing, it’s made specifically with longevity and sturdiness in mind. I’ve had mine for two years now, and I haven’t regretted it for a minute. It’s tough, attractive, easy to use, it includes a free arm (something that will be really important to you if you plan on sewing arm holes, sleeves, or other narrow openings!), it has a wide selection of stitches, and it has one of the best buttonhole options of any mechanical sewing machine.
My machine has been hauled around and had some tough fabrics put through it with no problem, and it’s still going strong! I really love its design, and as far as sewing machines go, it is very reasonably priced.
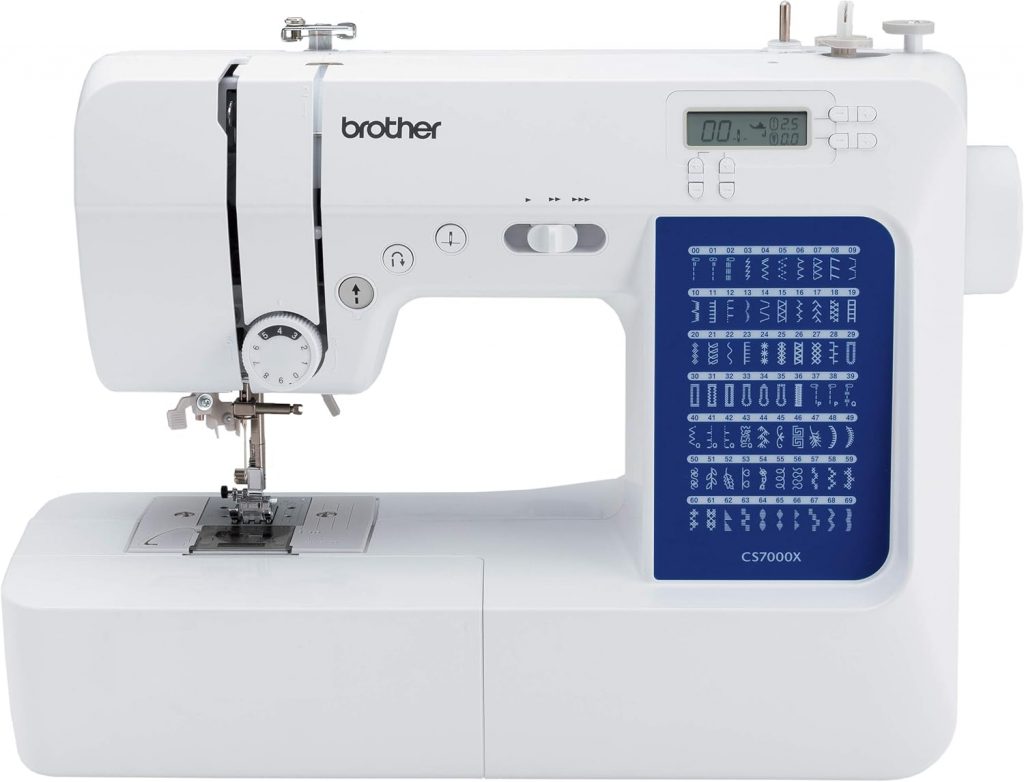
If you have a little more money and you know you’re going to be sewing a lot, it may be worthwhile to get a computerized machine like the Brother CS7000 70-Stitch Computerized sewing machine. My sister-in-law opted for this machine when she got into sewing, and she’s already made some amazing pieces with it.
The computerization gets you more stitches than the mechanical one above, easy and user-friendly operation, and wonderful details like the top loaded bobbin, extendable table, and the way it always leaves the needle in your work so that you don’t accidentally move your work under the presser foot. If you’re already ready for a computerized sewing machine, I recommend this one!
If you really want to get into sewing but can’t afford a machine like the Brother Strong & Tough, don’t panic, you still have options! Instead of trying to get a cheaply made, unreliable machine online, try your local second-hand stores. There always seems to be a sewing machine or two in my local second-hand store, and I even managed to get a nice serger there a few months ago! There are a few things to look out for if you go this route, however:
- Always make sure that the cords are included. You need the cord that plugs into the machine, AND the foot pedal! They are likely to be the same cord, but make sure!
- Check online to see if they are offering a fair price. When I found my serger, I quickly looked it up on my phone and found that they were offering it for $50 cheaper than you could buy it online. I looked at some reviews, and they said it was a solid machine as long as it was maintained, which brings us to…
- Check its condition. Does it look dirty and mistreated? If it’s dirty on the outside, chances are the inside is worse. The cleanliness of the inside of the machine is very important, since that’s where the working parts are, they tend to get very dirty, and it’s less likely to work if they’re covered in grit and fabric fluff. It may end up costing you more in the long run if you have to take it in to get cleaned before you can use it.
- Iron
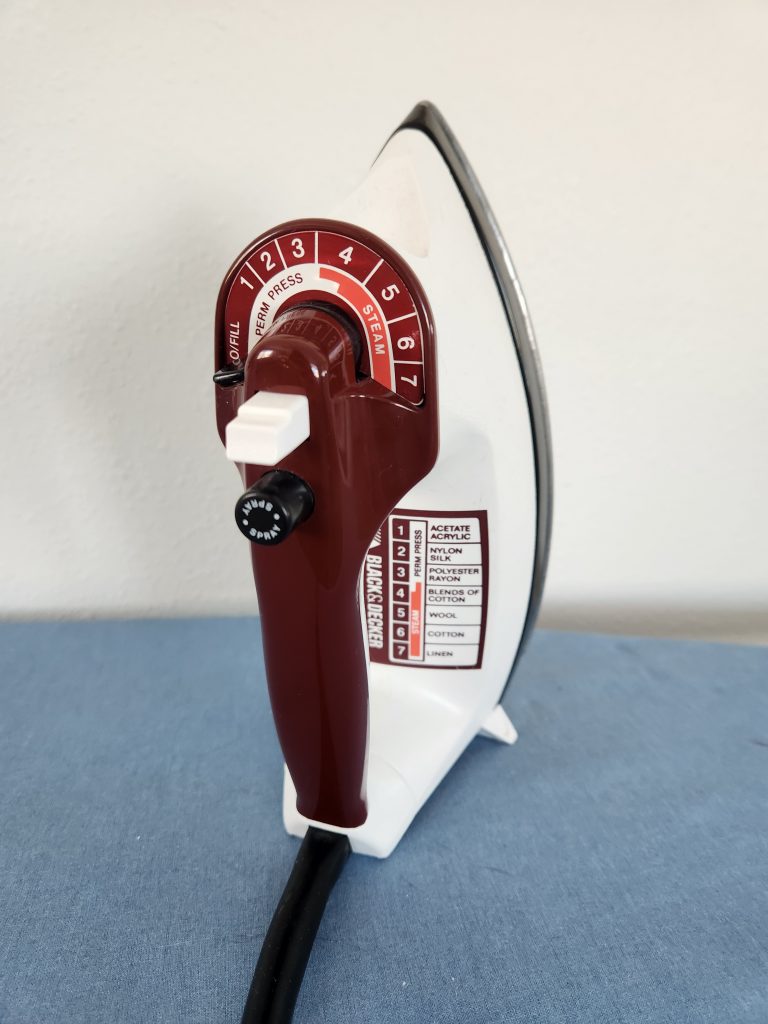
Next you’ll need a reliable iron! An iron is a metal-bottomed, hand-held machine used to iron and press fabric. It may not seem that necessary before you try sewing, but trust me, it is. When you get the fabric for your first project, you’re going to need to wash it, and when it comes out of the wash it is going to be wrinkly. Wrinkly fabric makes cutting out patterns so much harder! You are also going to need it for pressing creases into the fabric and finishing the seams you sew, as well as giving your finished projects a nice press.
So how do you get one? If you have the resources, you can buy one online or in most fabric and craft stores. They come with many different functions, but the only ones that are important are that it heats up, has labelled heat settings, and steams. Even the simplest irons will do!
Don’t mind a simple iron? Then there are many places to get them for cheap or even for free! Like sewing machines and many of the other materials you’re going to need, they can often be found at second-hand stores. Look for an iron with an intact cord, a clean face, and a functional setting adjuster. It’s important for it to be adjustable, as different fabrics require different temperatures. Look for one that has a guide on it for different fabrics as well.
Finally, there is likely to be at least one available to you for free. When I first started sewing, people were reaching out to me to give me their irons! Many people have irons but no longer use them because of changing trends in clothing and work attire, so ask your family and friends if any of them have an iron they are willing to part with.
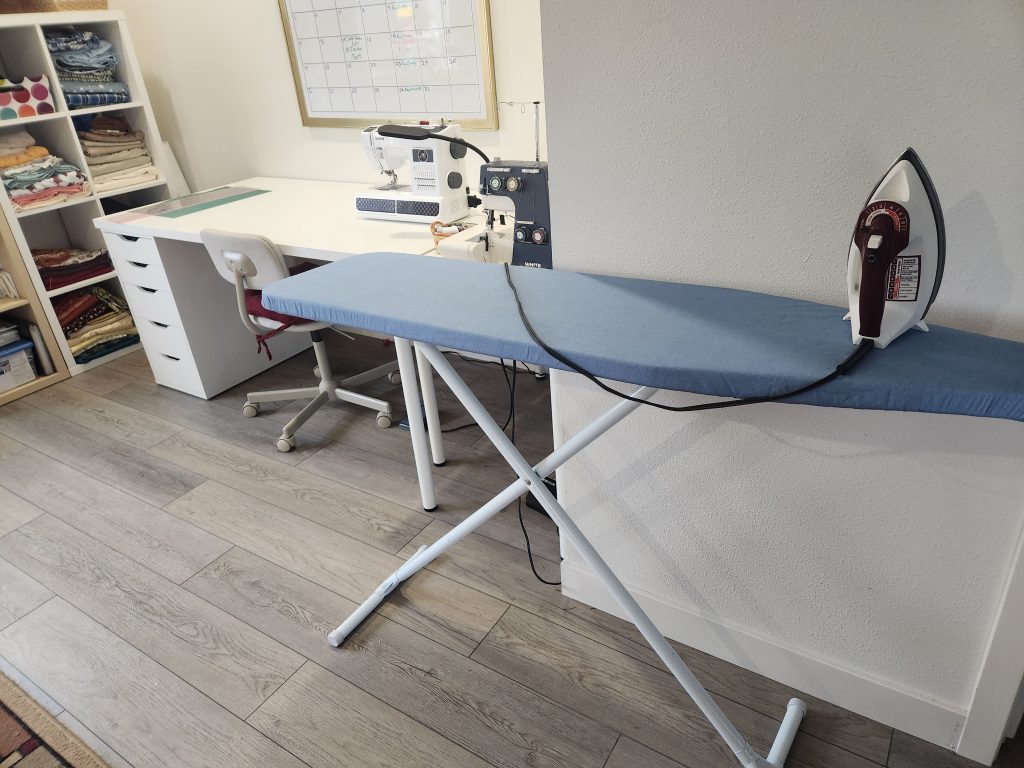
- Ironing Board
And while you’re asking your family and friends for an iron, why not ask for their ironing board too? Like the iron, an ironing board will be necessary for pressing and ironing your projects. You can find them in most of the same places you can find an iron – fabric stores, second-hand stores, and relatives. They can be quite expensive new, so I highly recommend getting one second-hand. I bought mine for $7! It’s great to be cheap and sustainable at the same time!
Here’s a well-rated one on Amazon made by Seymour in the USA! I always love purchasing things that were made in America:
Here’s a cheaper compact tabletop version:
If you find one that has a worn out cover or doesn’t have a cover at all, you can buy one online. I got this one for the ironing board I bought from a local second-hand store a couple years after I bought it, when the cover had worn out:
- Fabric Scissors
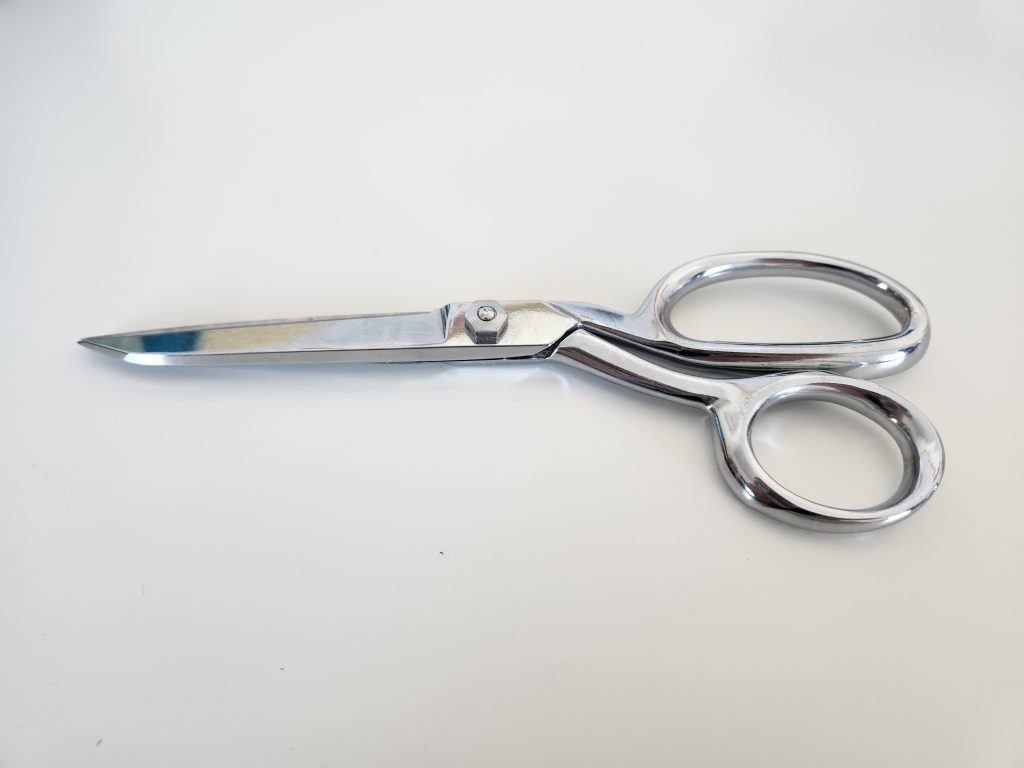
You will also need a pair of fabric scissors, also known as tailor’s shears. Normal scissors aren’t sharp enough to cleanly cut through fabric, and as you get better at sewing you’ll notice that the cleaner you cut your fabric, the cleaner your finished projects will be. I recommend getting these either new or from friends or family. They can dull and break over time, and if you use them on normal stuff like paper it can ruin them, so I wouldn’t buy fabric scissors from second-hand sources.
You can buy scissors as cheap as these made by Singer, one of the most trusted sewing brands:
Or you can opt for more expensive, metal, and bent-handled scissors like these. The bent handle can be very helpful for cutting fabric cleanly. I actually use an old, slightly different pair of these that my dad bought many years ago, and I love them. Despite decades of use, they are still sharp and functional. Gingher is a well-known and respected brand for fabric scissors:
- Seam Ripper

Seam rippers are another essential sewing tool. They are a simple tool consisting of a handle and a sharp spike with a ball-tipped hook.
Seam rippers are used for tearing threads out of seams when you make mistakes, alter garments, or need to take out basting stitches. They are quite cheap, and can be found in many sizes and qualities. Pretty much any seam ripper will do, but I prefer mine to have comfortable handles for when I make big mistakes. 😉
This is the one I have. It comes with a thimble, which I’ll admit that I never use, but the handle of the seam ripper is perfect!
If you would like a smaller or cheaper one, this Dritz would be a good choice. Dritz is another classic sewing brand:
You can also get them in a set with fabric scissors and a retractable tape measure!
- Pins
Pins are necessary for keeping the pattern pieces together when you are sewing seams. Many people want to skip pinning when they start sewing, but they will make your life so much easier! I don’t think it’s a good idea for any beginner not to have and use pins all the time. I still pin almost all of my seams before sewing, if only to make sure I don’t need to worry about it while I’m sewing.
Let’s just say you’re going to need that seam ripper EXTRA if you don’t use pins! Make sure you use fabric pins and not bulletin board pins or other kinds. I had some mixed into my pins and they were such a pain, always snagging my fabric!
Pins are another great thing to get from second-hand stores or friends and family, but if you don’t find them there then you can get them online.
I recommend the ball head kind because they are much easier to pick up, see, and work with than the metal head kinds. These Singer pins have nice ball heads and come in a cute flower case! It includes plenty of pins for most projects:
For extra security, you can get glass bead pins like these. The plastic pins like the Singers above will work just fine, but you have to make sure not to run over them with your iron or they will melt into your project. These glass bead pins won’t do that!
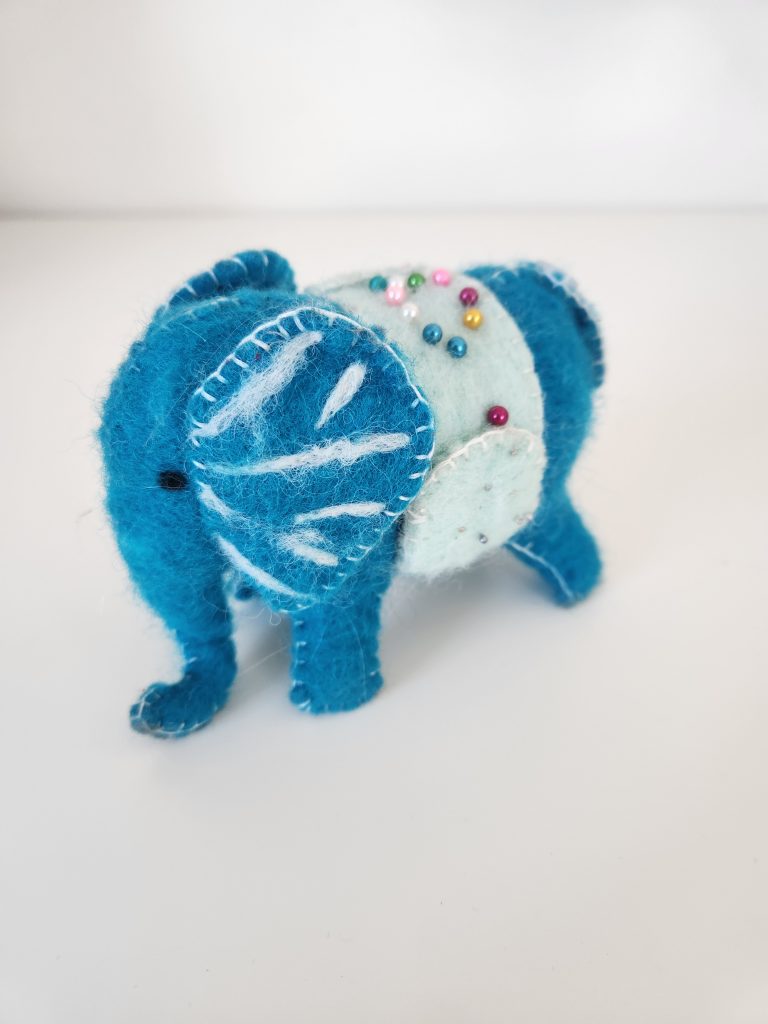
You can absolutely make do without a pin cushion for your pins. Just use the box they come in to contain them. If you’d like a pincushion to make them a little more convenient, you can make one or buy one. They are fairly easy to make and are a great fabric scraps project. Online options include numerous varieties, including:
And my favorite, the pin cushion I own!
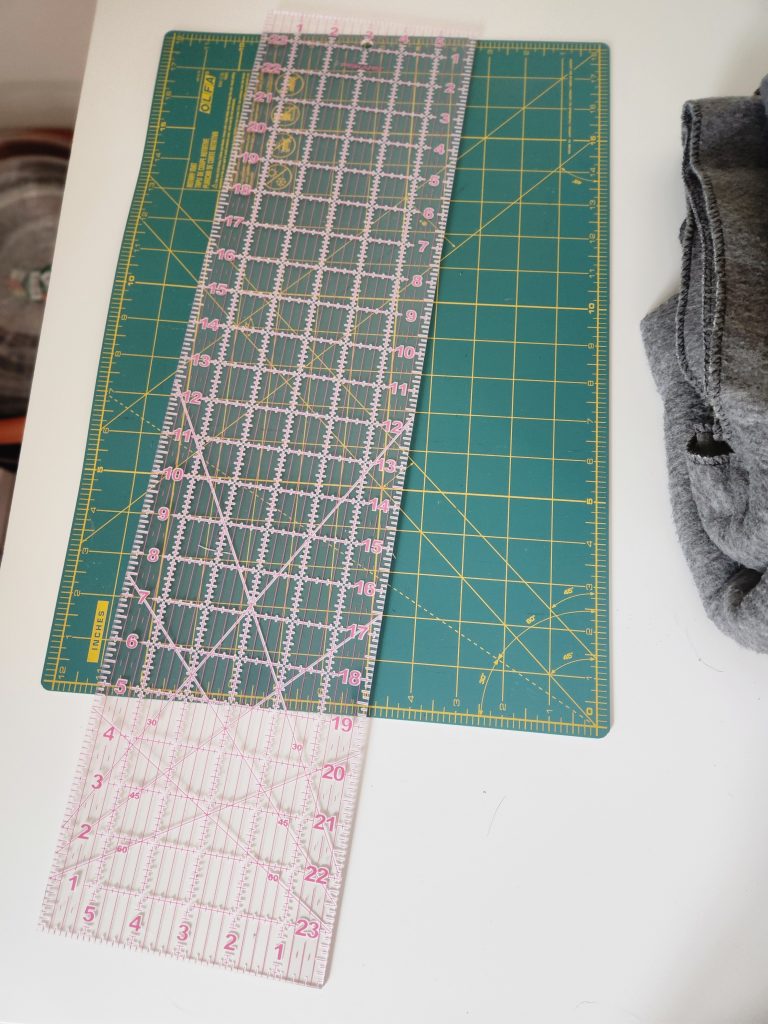
- Sewing Tape Measure/Ruler
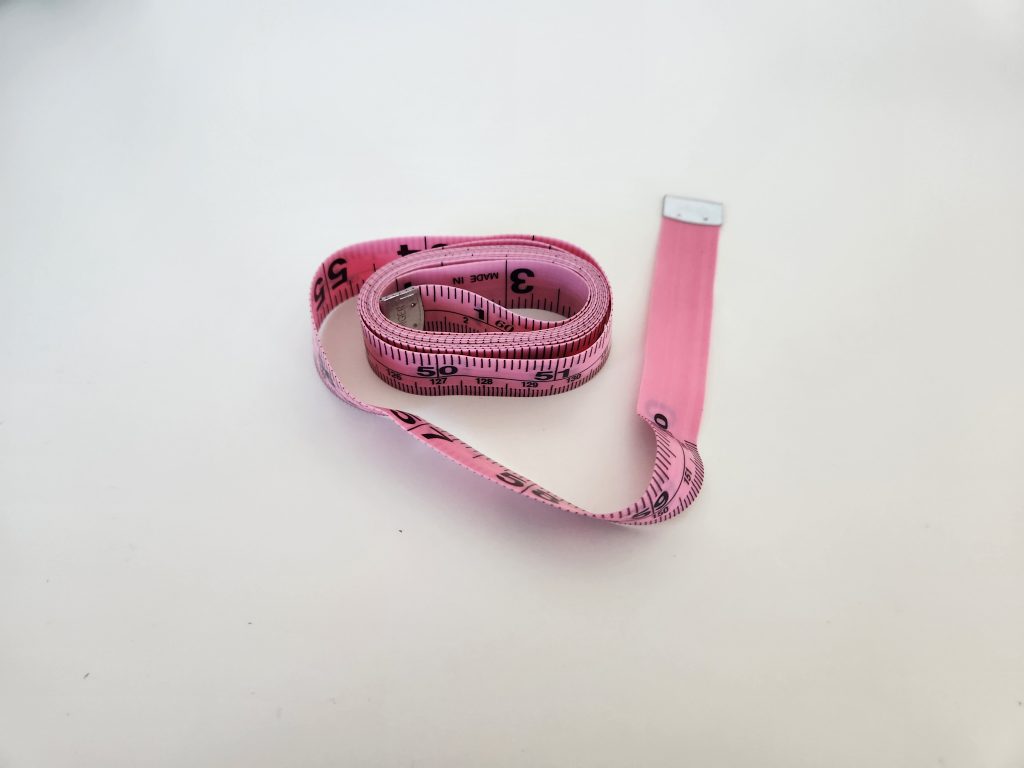
Another couple of tools you’re going to need are a tape measure and a straight edge ruler. Especially if you’re planning on making clothing, a tape measure is essential for taking your measurements or the measurements of whoever you’re making clothing for so that the clothing you spend your valuable time making actually fits! I recommend a simple tailors tape measure like this one:
But you could also use a retractable one like this (also available in a set with the seam ripper and tailors scissors):
The retractable tape measure seems useful, as wrapping up the non-retractable varieties can be tedious, I don’t want to recommend them over the normal kind since I’ve never used one. I don’t know if the retractability would be helpful or would make it harder to use. I’m sure either kind will work though!
It’s also important for you to have some kind of ruler. This can be as simple as a normal school ruler like these:
Or you can skip right to a 6” by 24” sewing ruler like this one from Fiskars:
I have both of these tools, and both have been very useful. If I had to choose one, I would take the sewing ruler, as it has helpful guidelines and is a much more useful size. I’ve used mine numerous times and I love it!

- Tailors Chalk or Water-Erasable Markers
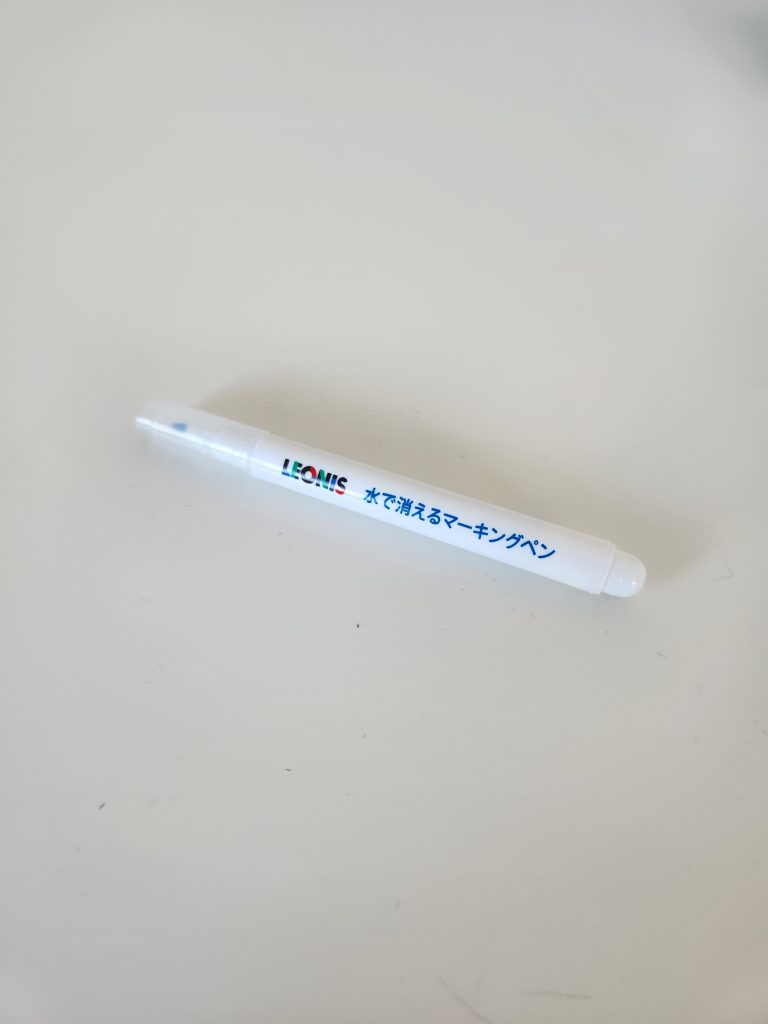
There are many options for marking your fabric, but you’re going to want to make sure that whatever you use comes off of fabric! Options include the classic tailors chalk, which comes in triangles of chalk or pens, heat erasable pens, and water erasable pens. Each has pros and cons that you’ll want to consider.
Tailor’s chalk is the cheapest and simplest option. It is simply chalk or wax that you rub on your fabric that you can wash off after finishing your project. They are the easiest option to find and there are numerous varieties of them. They can be a bit messy, and sometimes they wear off before you’re done with them. Here’s a simple version that comes in a convenient case:
Heat erasable pens are a popular option. They work like normal pens, but when you’re done with the markings, you erase them with your iron. They’re a step up from tailor’s chalk, but you need to make sure you don’t iron the markings before you’re done with them. They are the most precise marker I’ve found, with much finer tips than the other two options!
The last option is water erasable markers. These are my personal favorites. They mark well and last a long time and they are harder to accidentally erase, but they are easy to erase when you want to. I keep a water spray bottle that I use to erase the lines whenever I need to while I’m working!
- Bobbins
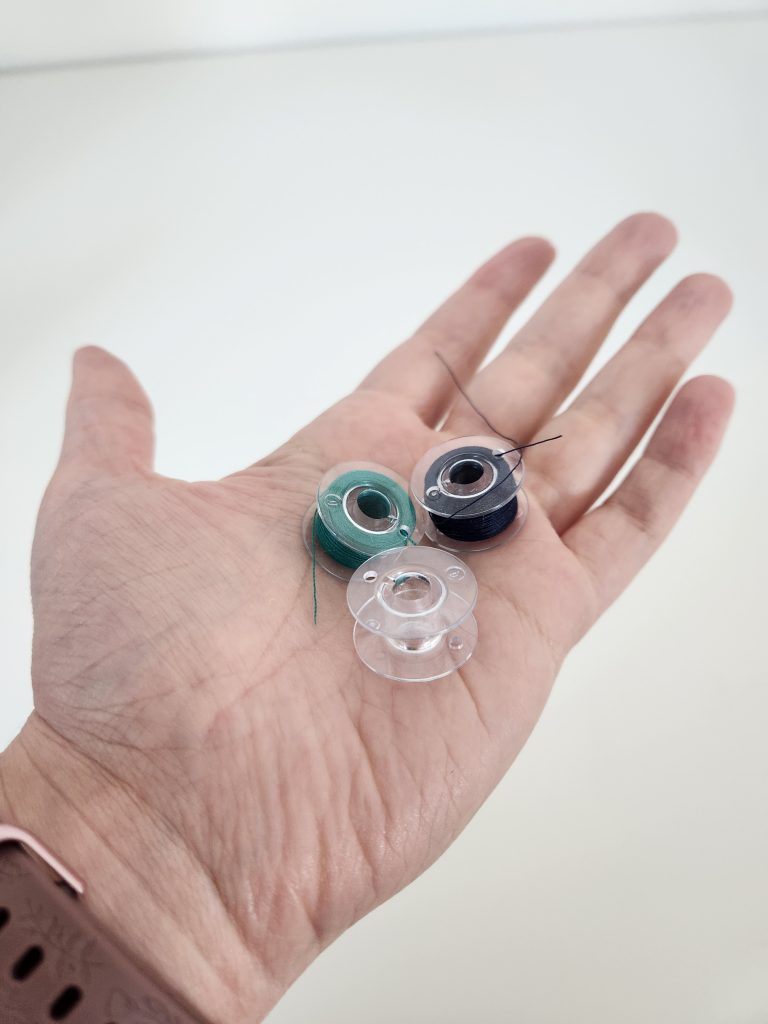
While bobbins are a necessity, if you buy a new sewing machine it should come with enough for you to begin sewing. If you buy a used machine that doesn’t come with any, you’ll need to buy some before you’ll be able to use it.
Bobbins are small clear plastic spools that you will need to load with the thread you want to use and insert into the bobbin case in your sewing machine. They are used to make the stitches underneath your work, while the spool of thread that goes on the top of your machine makes the top of the stitches.
Different machines use different bobbins, so even though they all tend to look the same, it’s important that you get the right ones for your machine! The two Brother machines I mentioned above use the same bobbins, but cannot use bobbins from other machines. Using the wrong bobbin can mess with the thread tension while you sew or even damage your machine.
I recommend spending the extra to get genuine brand name bobbins made for your machine rather than going for knock off bobbins, as the cheaper ones are not made to the same specifications.
These are the bobbins needed for the Brother Strong & Tough and the CS7000i machine. I use these and they work great:
- Needles
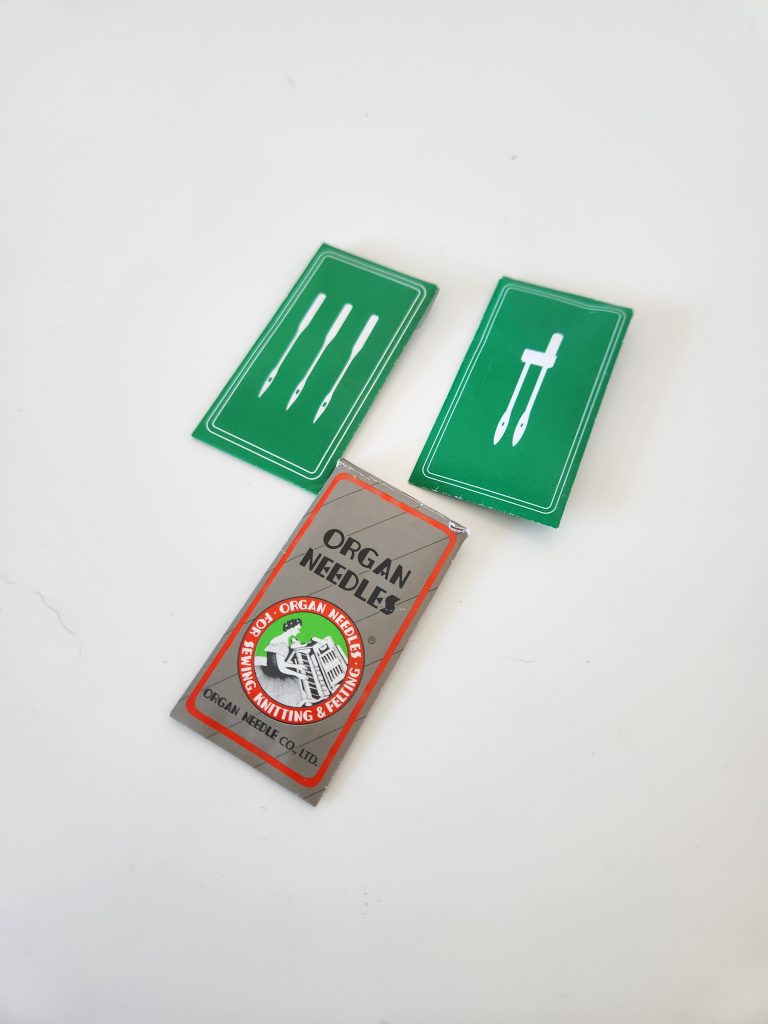
Another tool that should come with your machine is the needle. Machines usually come with a needle already installed, and most come with extra needles. If you buy a used machine, make sure to check the needle on it before you use it. Like the bobbin, the needles are specific to the machine, but many people end up using needles that shouldn’t be used on their machines. Make sure the needle on your machine is the right kind or it may damage your machine.
Something you should know before you begin sewing is that you will break needles. Especially when you first start, you may do things that put pressure on the needle and it may snap or bend. Over time the needles lose their sharp point, and this can make them more likely to break. I’ve broken several needles! Don’t be afraid of it, but get extra needles so that when it happens you don’t have to wait for new needles before you can finish your project.
You can also get different needles for different purposes. You probably won’t have to worry about it when you first start unless you want to try working with stretchy knit fabrics. There are special needles for these fabrics that help them sew smoother.
Here are the normal needles for the Brother machines above, with three different sizes for different weights of fabric:
You will also at some point need some hand sewing needles. You may not need a lot of them, but having a couple for sewing up the occasional invisible seam or turning hole is invaluable. Here is a pack that would include everything you would need for a beginning sewist:
- Fabric
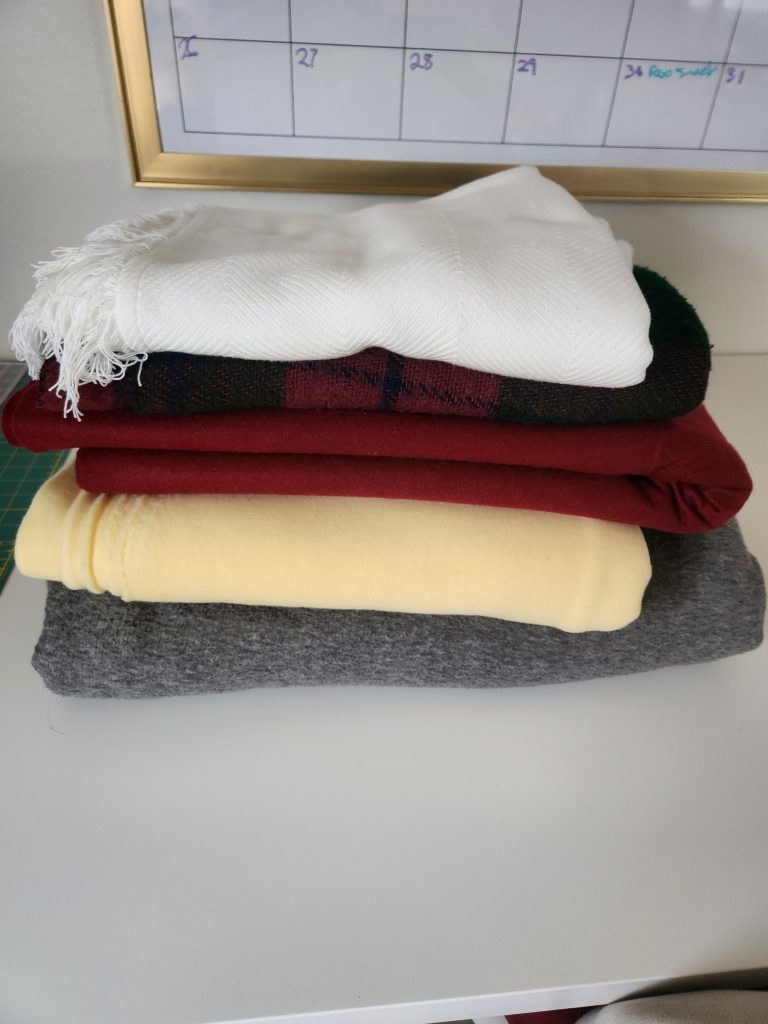
For your first project and every project afterward, you’re of course going to need some fabric! Buying fabric might be my favorite part of the process, because, as they say, collecting fabric is a hobby all by itself!
For your first few projects, I highly recommend getting second-hand fabric. Your first attempts at sewing will most likely not be your favorites, and you don’t want the stress of pricey fabric to be weighing on you the whole time you’re learning.
Instead, go to your local second-hand store and look in the bed sheets section. While some thrift stores do have fabric sections, I’ve had the most luck with bed sheets. Sheets are cheap, large, and come in a variety of fabrics. I still buy bed sheets for many of my projects because they work so well and are so much cheaper than new fabric!
If you don’t know what to start with, try looking for a 100% cotton sheet with a pattern or color that you like and a nice surface. Check it for worn patches and stains, and make sure that both sides of the fabric feel alright.
Once you have some experience with sewing, you can get cheaper fabric at big stores like Joann and Hobby Lobby by watching for their weekly sales. Fabric goes on really good sales in these stores all the time.
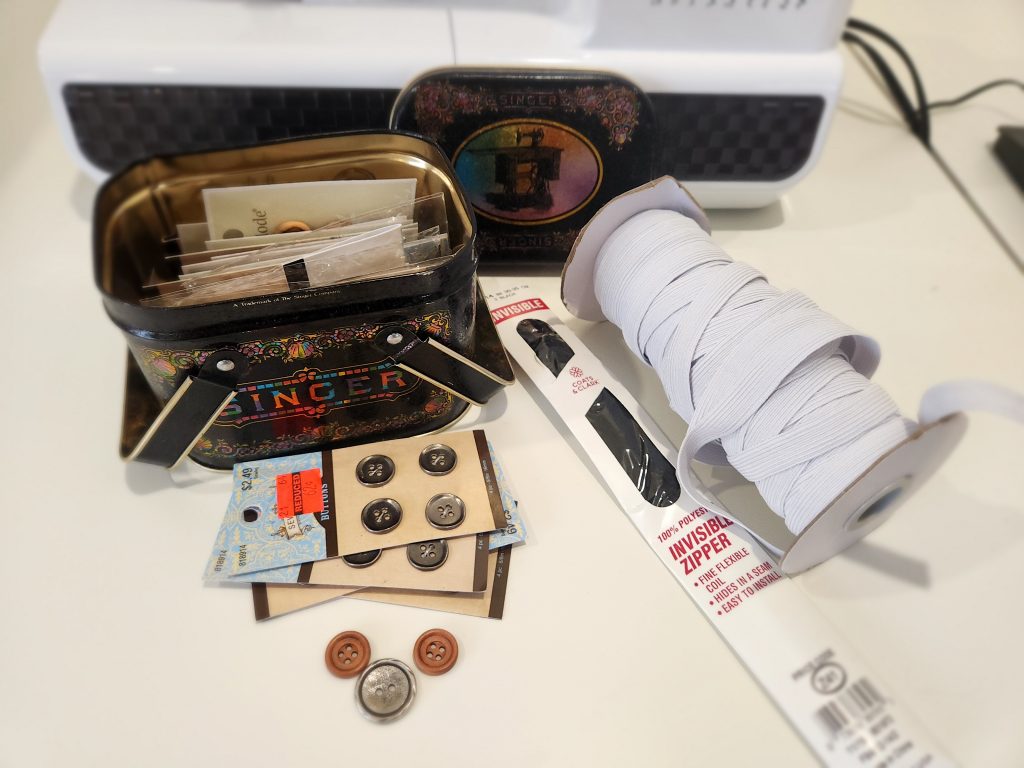
- Thread and Other Notions
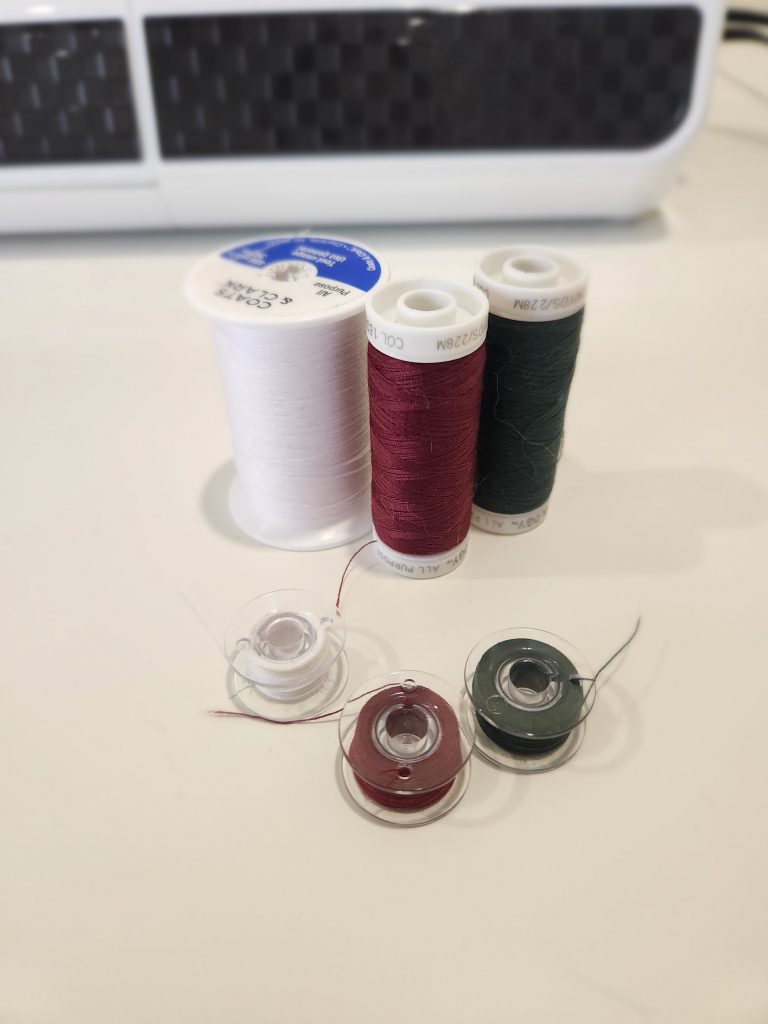
The final materials you’ll need to begin sewing are thread and other notions for your first projects. You will want thread that matches your fabric as closely as possible unless you want it to be an accent.
Because of this, I don’t recommend buying a variety set of threads. Thread can get brittle over time, so all of those colors you don’t use will be less reliable after a few years. They also won’t necessarily match your fabric, and even a little difference can be obvious in a finished garment. Instead, take a small piece of your fabrics to a craft store where they have a wide selection of threads and find one that matches as closely as possible. Thread is often on sale if you watch for it!
Notions are any small accessories that you need to finish your project, such as buttons and zippers. When you’ve chosen your first project to sew, make sure you know what notions you’ll need to finish it.
If you want to make a gathered skirt for example, you’ll need some elastic for the waistband. To make a button-up skirt, dress, or shirt, you’ll need buttons. To make a fitted dress without buttons, you will probably need a zipper of a certain length to reach down past the waist line. You can find these at large craft stores in individual packs or online in bulk.
Optional Sewing Materials
If you’re certain you want to sew lots of projects and you have the resources, you may want to get some tools and materials that aren’t as necessary, but will make sewing easier and more enjoyable. The below tools are my recommendations for anyone who wants to go all in!
- Rotary Cutter and Self-Healing Mat
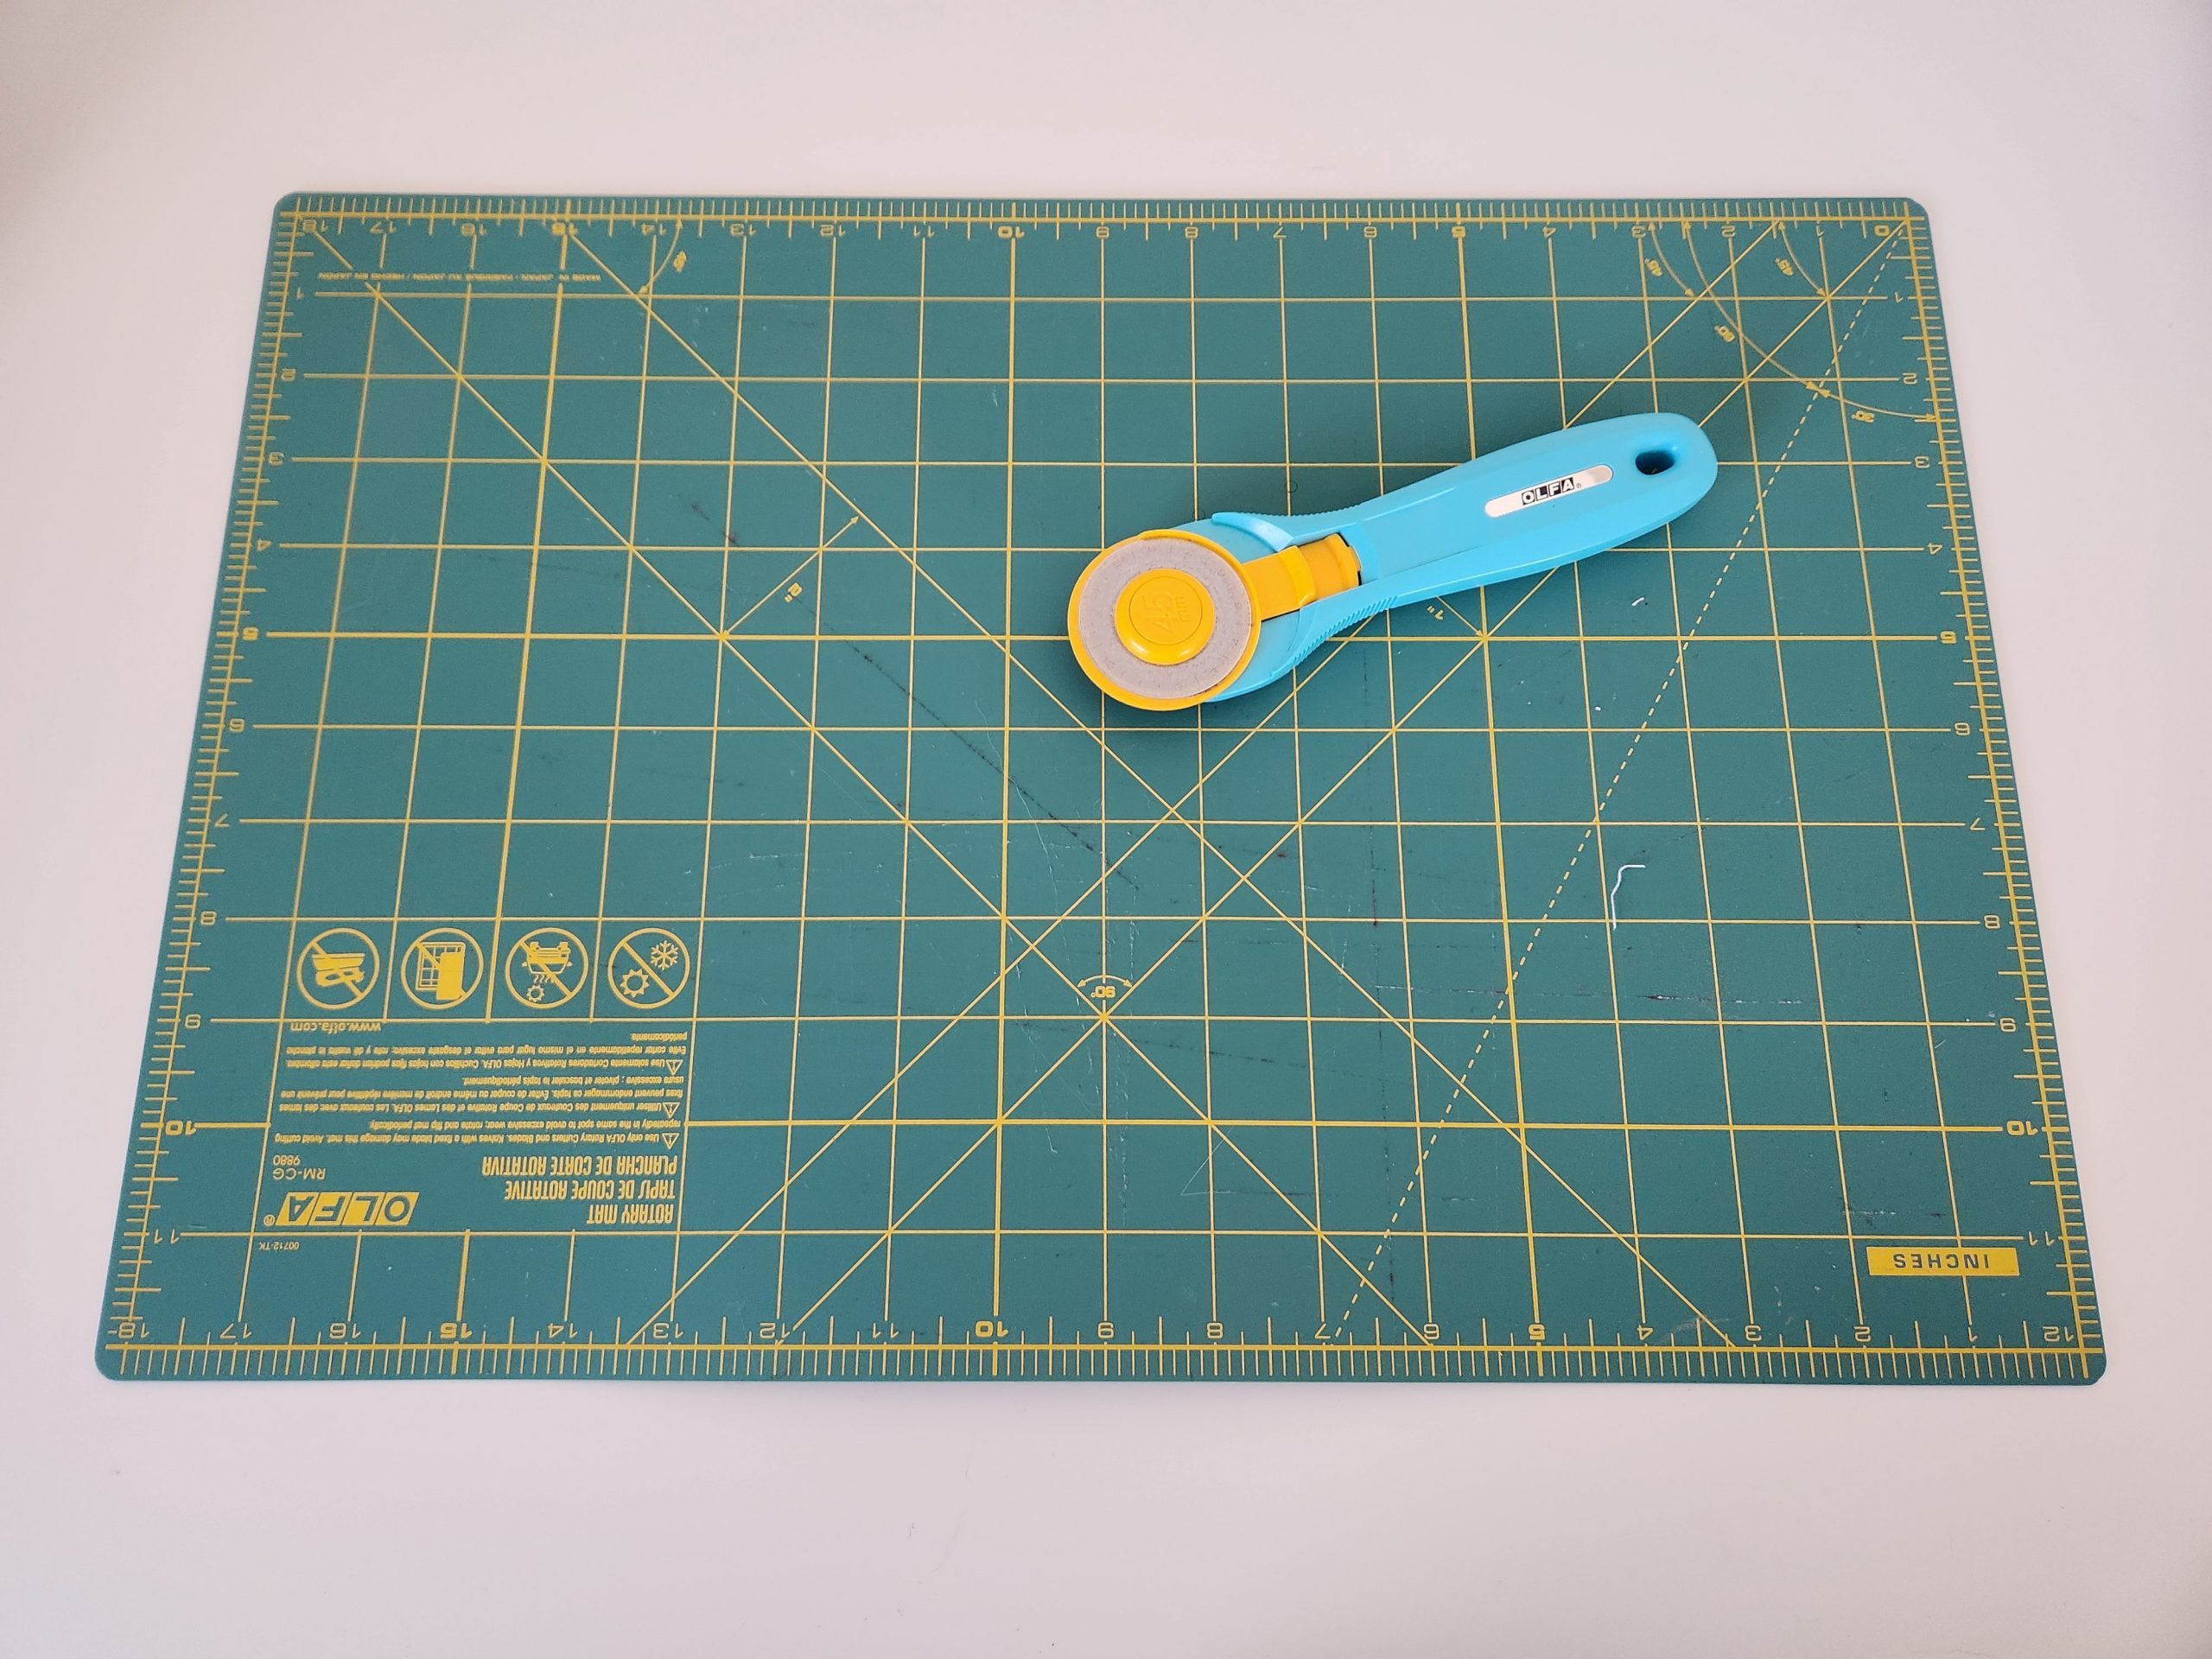
Rotary cutters are sharp, circular knives that make cutting straight and curved lines a piece of cake. They cut cleanly and easily, and are commonly used for quilting. Make sure you get a self-healing mat for using under it, or you’ll cut into whatever is under your fabric!
Here is a great Fiskars option with a comfortable handle and replaceable blade:
And here is the cutting mat I recommend getting for it. Make sure your table is big enough for the mat you get. They can be expensive, but they often go on sale in large crafting stores!
- Buttonhole Presser Foot
Most new sewing machines come with a buttonhole presser foot made for your machine. They are invaluable for creating buttonholes easily! The one that came with my Brother Strong & Tough is so easy to use, and it came with instructions on how to use it.
If your machine doesn’t have one, it may not have a buttonhole stitch option. There are many tutorials out there for how to make buttonholes without the buttonhole stitch and buttonhole foot, so don’t let that stop you! Making buttonholes and sewing on buttons is one of my favorite parts of sewing my favorite button-up dresses and skirts!
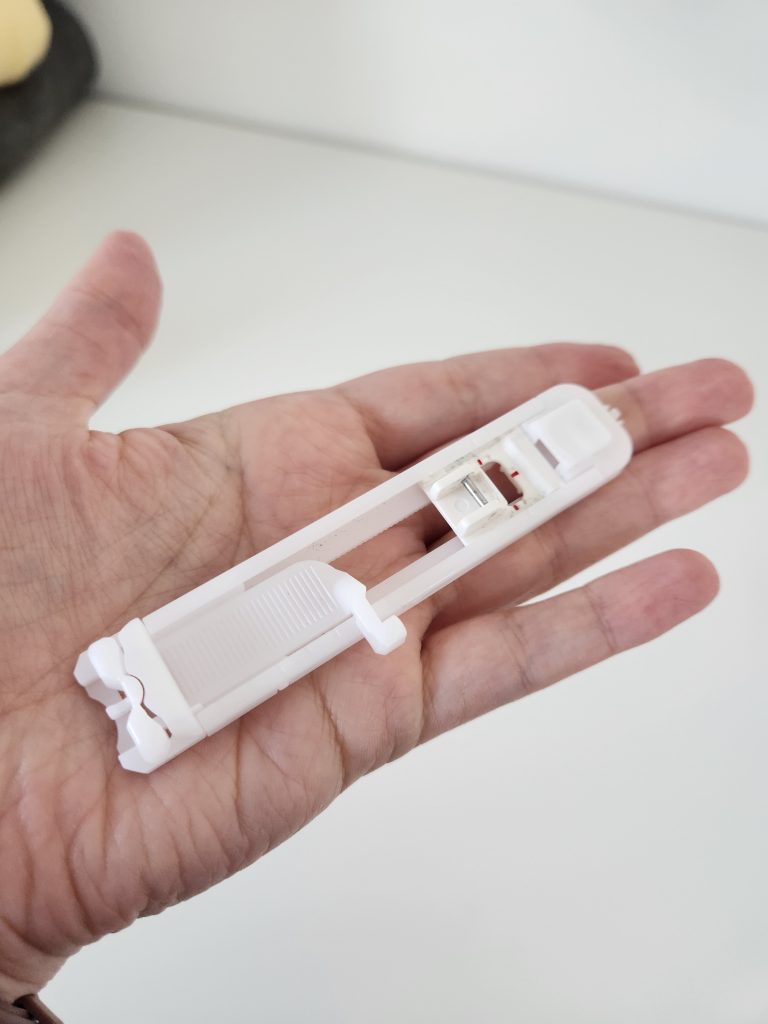
- Invisible Zipper Presser Foot
Another foot your sewing machine might come with is the invisible presser foot. Unlike the buttonhole foot, the invisible zipper foot is difficult to do without if you ever plan on using invisible zippers. It is difficult and frustrating to install them with normal presser feet. If you get a machine that doesn’t come with one, do some research to find one that will work for your machine.
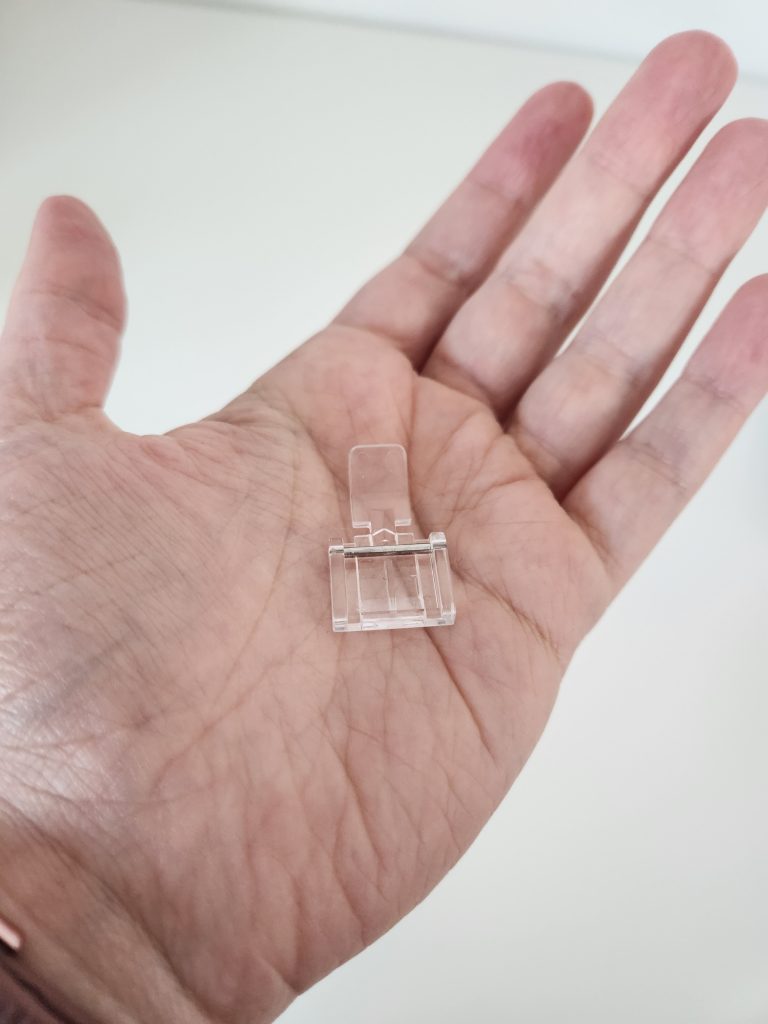
- Binding Clips
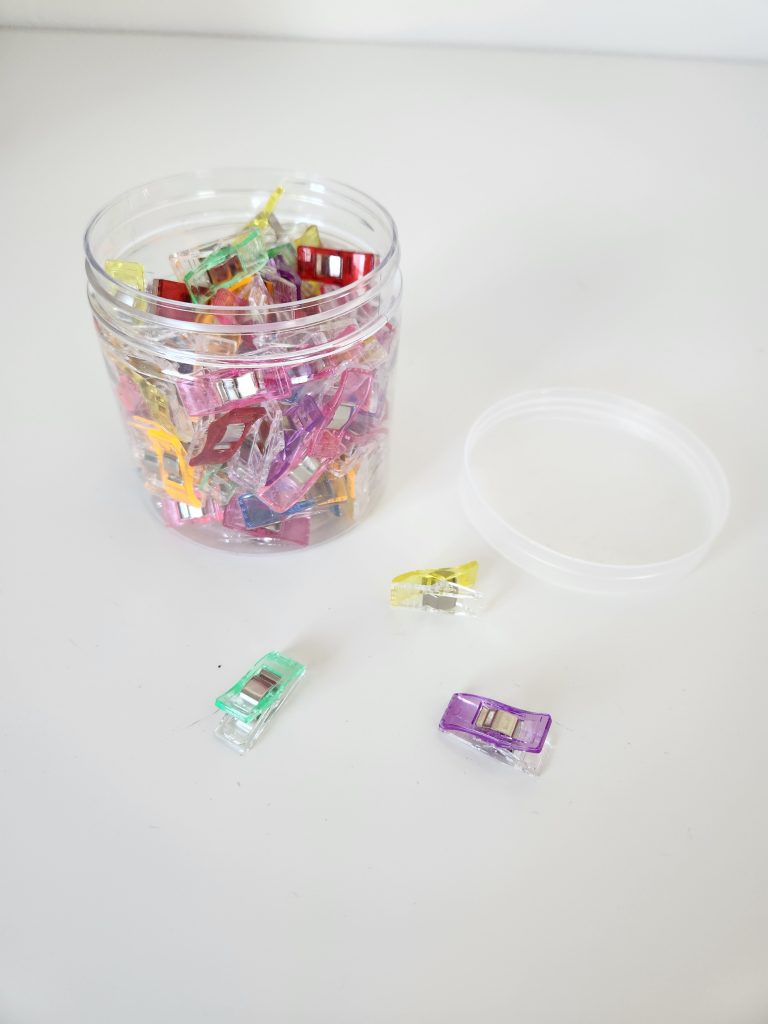
Binding clips are simple clips for holding fabric together like pins. There are some situations when using clips is much easier than using pins, such as when you use thick layers of fabrics, or when pins leave holes behind in the fabric, such as with faux or real leather.
They come in very cheap varieties like these, which can break somewhat frequently:
Or nicer varieties like these:
- Pinking Shears
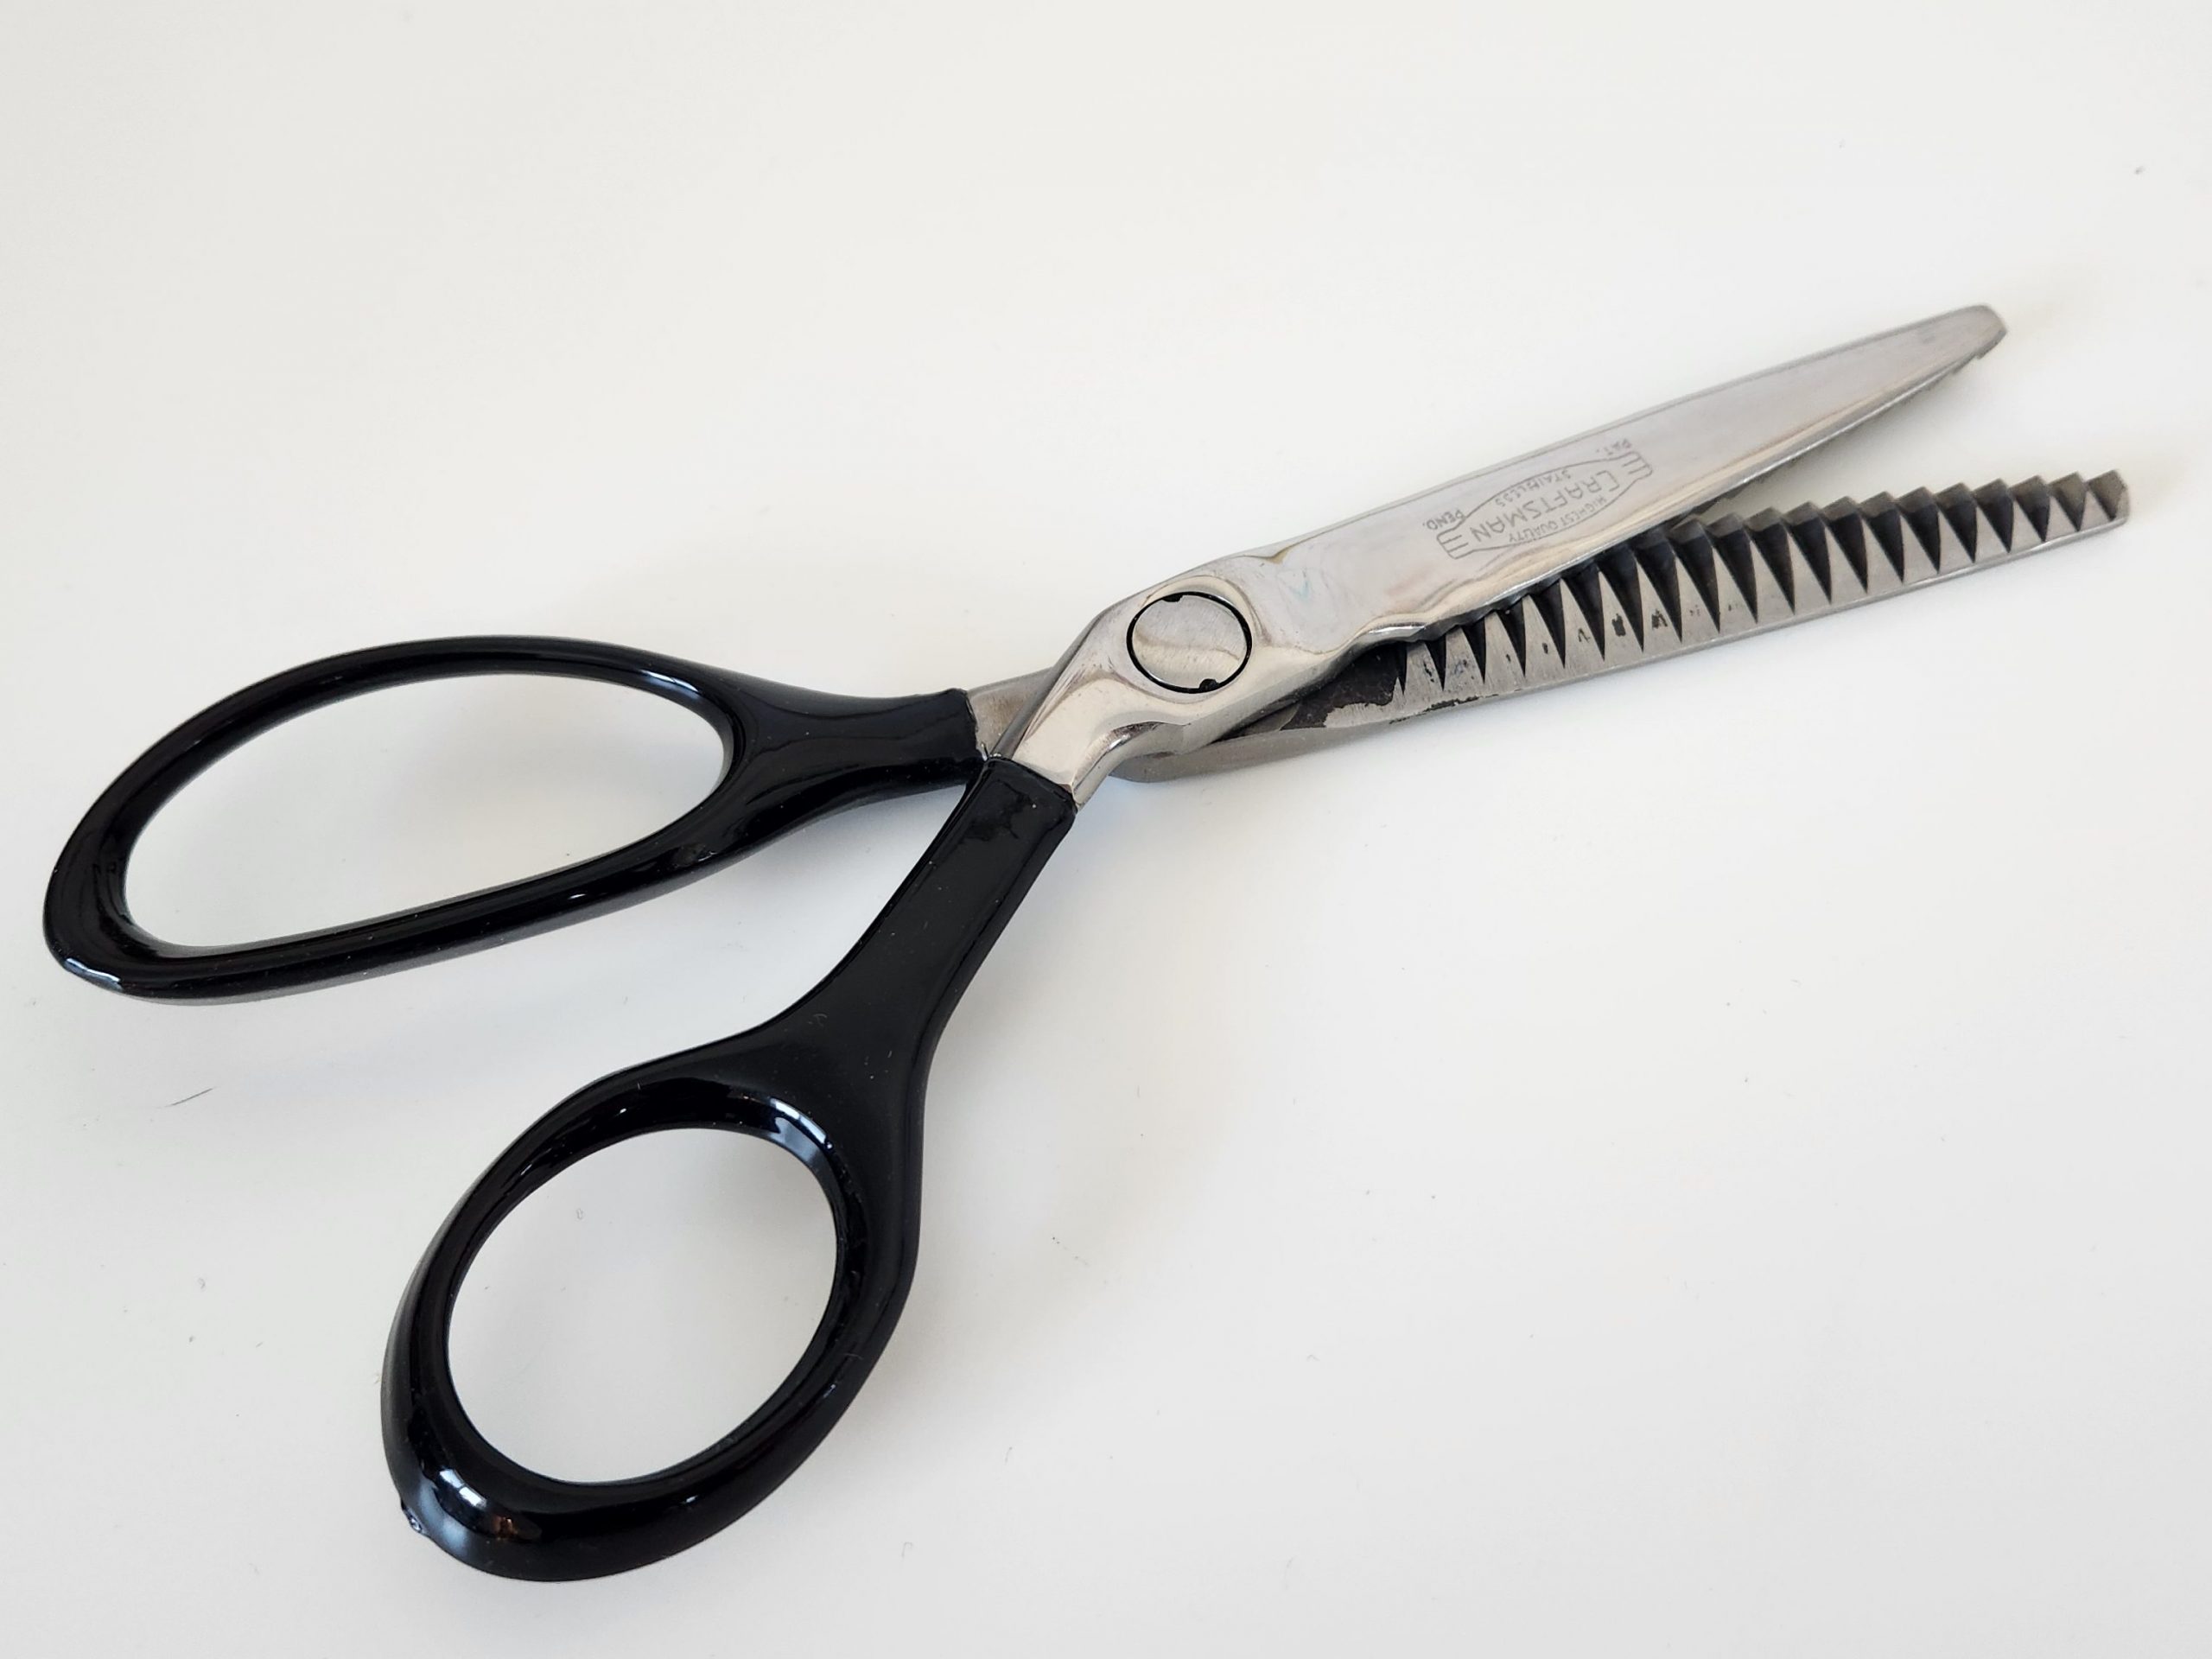
Pinking shears are a type of scissors with a zig-zag edge used to finish seams. They work by cutting the fabric so that the edge is cut on the bias. Because cuts on the bias tend not to unravel in woven fabrics, this keeps the edge from unraveling without the use of a serger or other seam-finishing technique.
There are several ways to finish seams with your sewing machine, so these aren’t necessary, but they can be useful in certain situations. I’ve found several of these at second-hand stores, so you may be able to pick up some cool old ones, or you can get some new ones online.
Here are some highly rated Fiskars. Make sure you get fabric pinking shears and not paper edgers!
- Pattern Weights
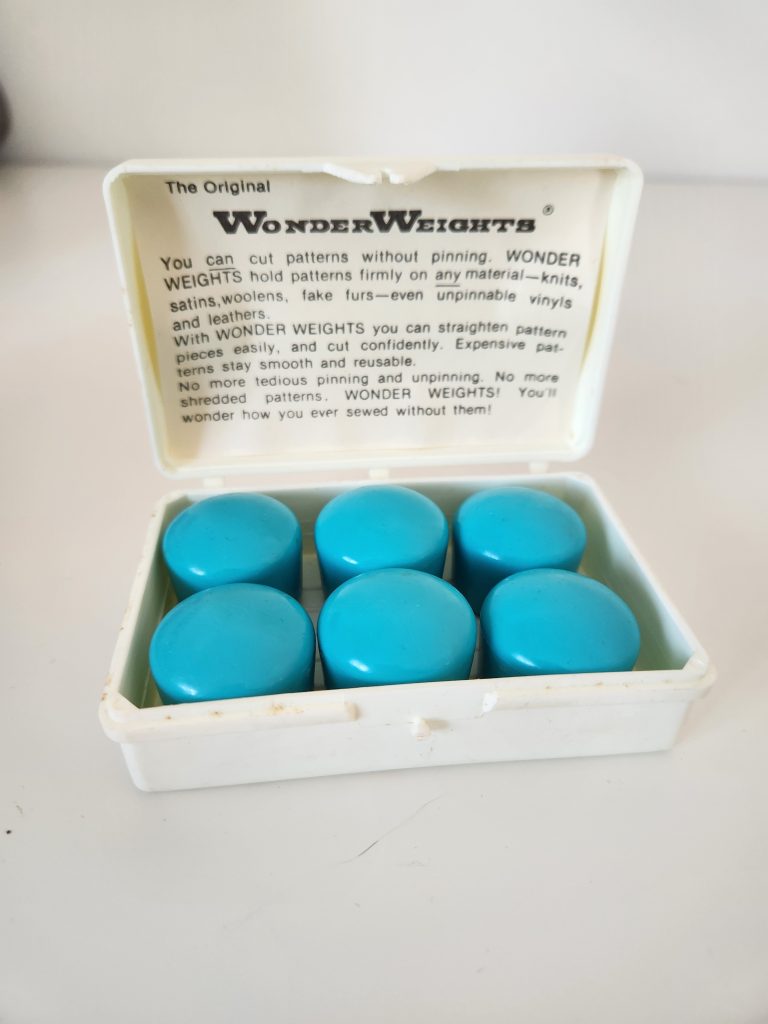
Pattern weights are simply weights used to hold down paper patterns while you cut out your fabric. Many people make their own out of fabric, clay, or other crafting supplies, but you can also buy them online.
These weights are similar to the kinds I’ve seen people make themselves:
Here are some really cool glass ones. These would be useful for seeing what you’re doing!
Another option is to use oversized washers. Metal works well for pattern weights since it’s so heavy!
- Thread Snips
Thread snips are like small scissors and are used to cut threads after sewing a seam or when tidying up the finished product. You can absolutely use your fabric scissors instead, and most modern sewing machines have their own razors for cutting threads after sewing, but having a small, easy to use pair of snips makes it quicker, easier, and neater!
They come in simple designs like this one:
Or special designs like this one:
Or even fancy designs like these!
- Pressing Hams
Pressing hams are an amazing invention for pressing curved or sleeve seams. They are simply stuffed fabric shapes that are used to give curved seams or the seams in narrow tubes like sleeves a crisp, clean finish. Make sure that you get one made out of a heat-tolerant material like this Dritz wool pressing ham. Wool can tolerate very high heat, unlike synthetic materials like polyester:
- French Curves
French curves are curved rulers used to make the curved parts of patterns such as sleeve holes and neck curves. While not necessary, they are very useful when making your own patterns!
This is the most common shape known as a french curve, and probably all you will need for most patterns:
Setting Up Your Sewing Space
Setting up your space is an important part of enjoying the time you spend sewing.
My first sewing space was my kitchen table, which was already half the size of most kitchen tables, and I would get my sewing stuff out when I wanted to sew and put it away when I was done. Now I’m lucky enough to have a wonderful sewing space that I put together for less than $150, and I can leave my sewing supplies on it whenever I’m not using it for other crafts.
I recommend finding a sturdy, flat place to use your sewing machine that’s at least two feet deeper than your machine and wide enough for an extra foot to the left of your machine so that you can easily move projects through.
Once you have space for your machine, you’ll need a space to cut out fabric. This is easiest on large, flat surfaces that are table height, but I’ve used spaces as small as a small folding table. I’ve even used the floor, although I would avoid carpet since it makes moving the fabric difficult and the scissors get caught in them.
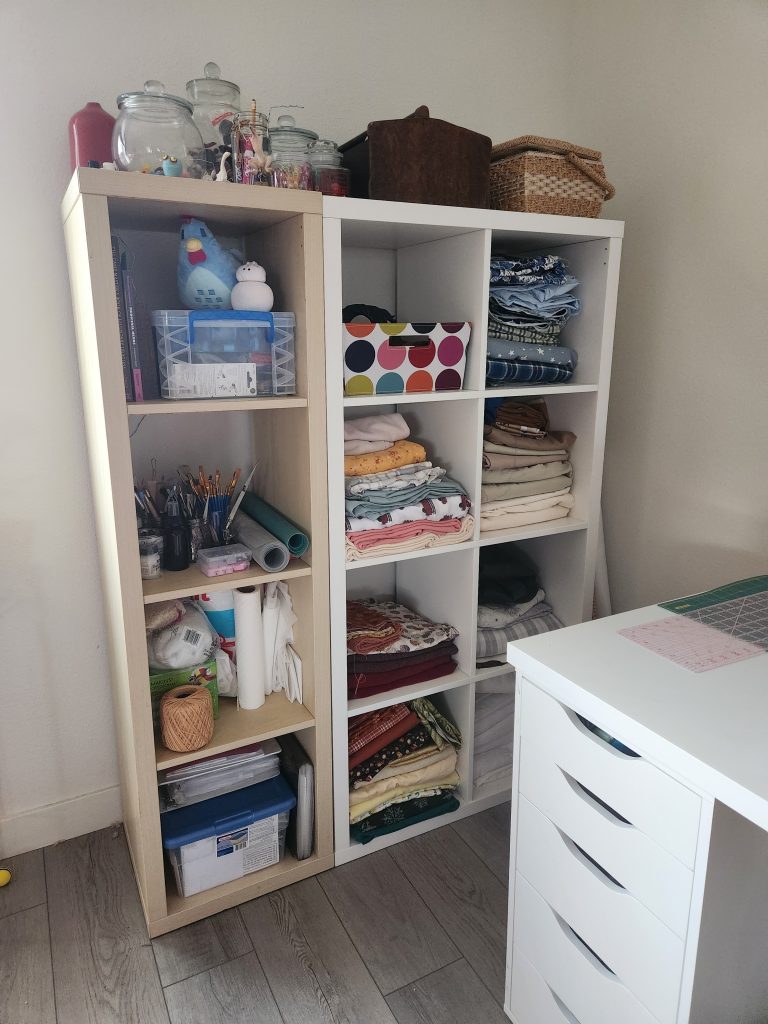
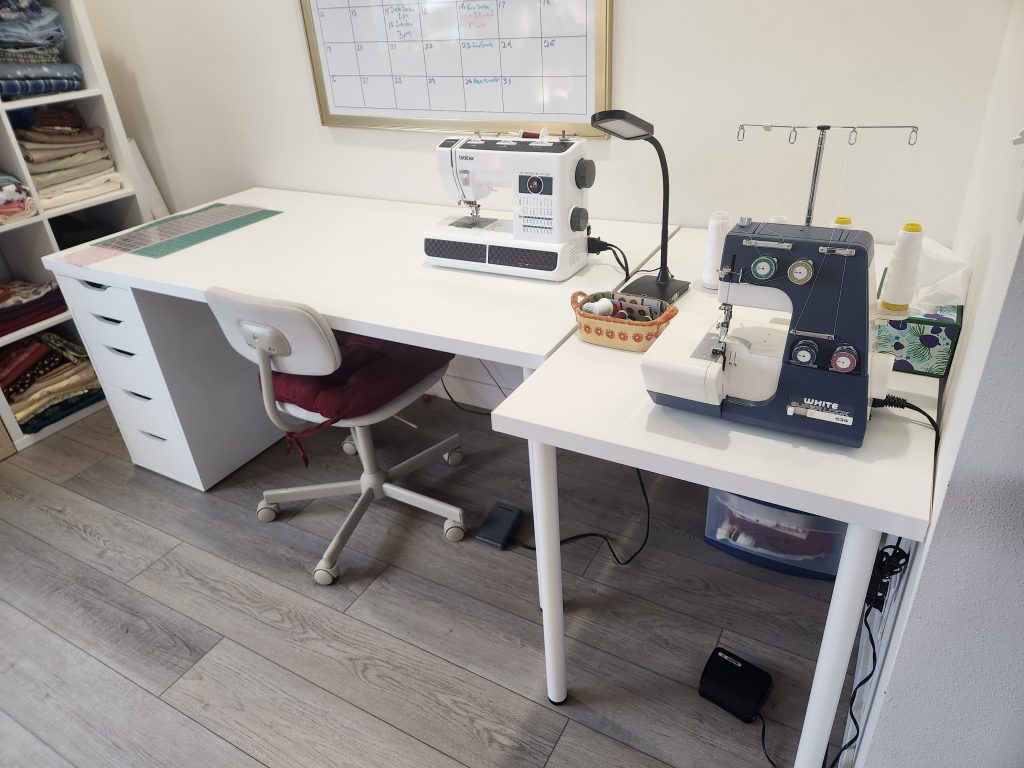
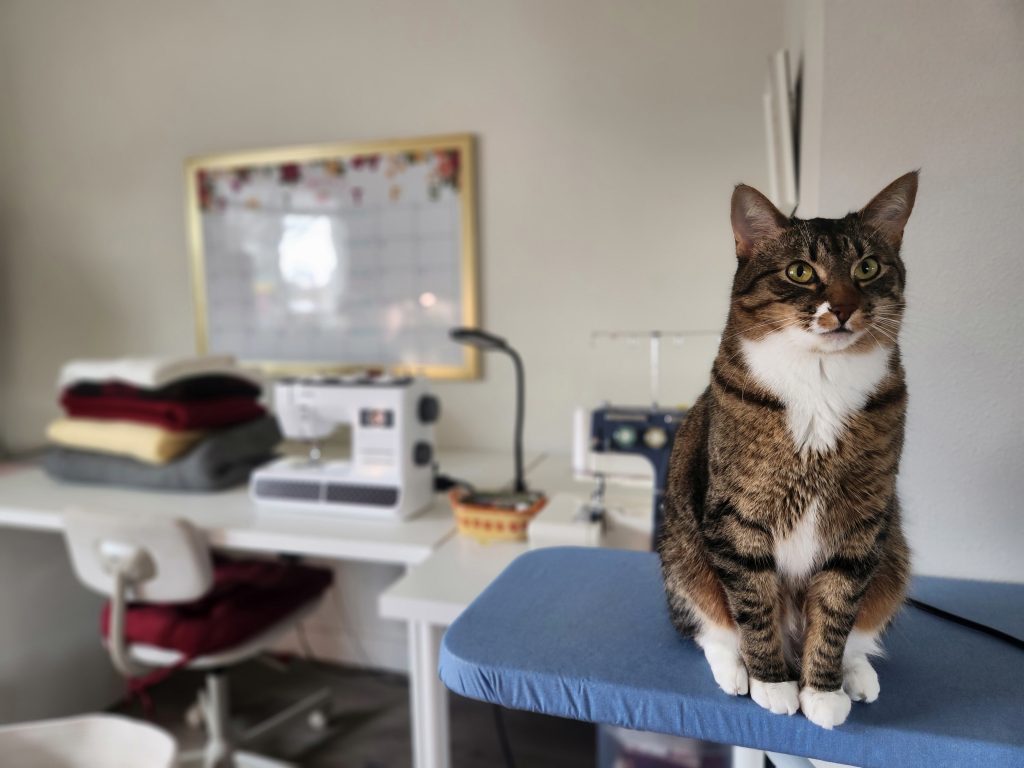
Once you have those essential spaces, you can set up your tools! Below is a picture of my work space. The desks, tables, and shelves are all from IKEA, but I got most of them secondhand for very cheap!
I use the drawers on the left for holding my tools, and I keep the left half of my workspace clear for use as a cutting table. I keep my most useful sewing tools in an old chocolate box that I set next to my sewing machine for easy access, and I keep a bin or basket to my right for collecting all of my fabric scraps and cut off thread. This setup works great!

Essential Sewing Skills
Now for the fun part, the sewing! This section contains every beginner sewing skill I could think to include, complete with pictures and explanations. If you want to be thorough, you could practice each of these skills on scraps of fabric, or you can choose a project to begin and practice them as they come up!
I believe either option is an absolutely valid way to learn. If you would rather learn these skills in a practical way, please check out my Sewing Your First Gathered Skirt tutorial (Coming Soon)! I will explain each of the steps in a detailed way for beginners, and you can follow along while getting some real experience.
- Preparing Fabric and Cutting Patterns
- Washing
The first thing to do before starting a project is to prepare the fabric. New fabric should be machine washed and dried to pre-shrink it, since you don’t want it to shrink after you’re done with the project. Second-hand fabric should be washed and dried as well because you don’t know where it’s been or if it’s already been shrunk. The one exception I can think of is fat quarters. Small pieces of woven fabric like fat quarters will become a tangled mess! Instead of washing them, steam them with your iron to pre-shrink them as best you can.
- Ironing

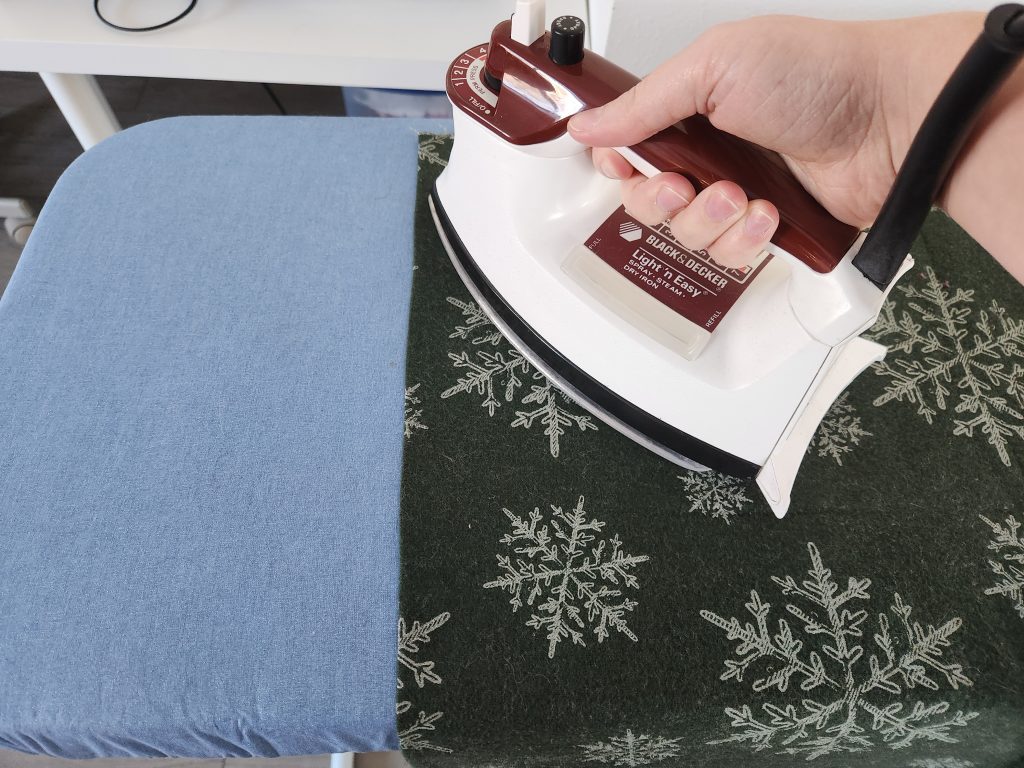
Once your fabric is clean and dry, it’s likely to now be wrinkly and maybe even unraveling. Clean up any threads along the edge with your fabric scissors so they don’t get in the way. Then heat up your iron to the right setting for your fabric material. If you aren’t sure what your fabric is made out of, set it to the polyester setting to be safe or test the cotton setting on a small piece of your fabric. Look out for burning or melting, that means it’s too hot!
Once you find a setting that smooths out your fabric without burning it, carefully fold your fabric in half the long way (hot dog style) so that the selvedges match up. Starting with one of the short ends, iron the fabric from the selvedges to the crease. Iron the crease so that it stays in the fabric. This will be the fold referred to when cutting the fabric! Iron all the way down the fabric so that it is all smooth and folded in half.
If you are using sheets or other large pieces of fabric, don’t worry about which ends to match up when folding. Either way will do.
- Cutting/Patterns
For most paper patterns, you will need to first assemble and/or cut out the paper pieces. You’ll need tape if using a pattern printed on printer paper, and you’ll need non-fabric scissors (never use fabric scissors on paper!) to cut out the pieces.
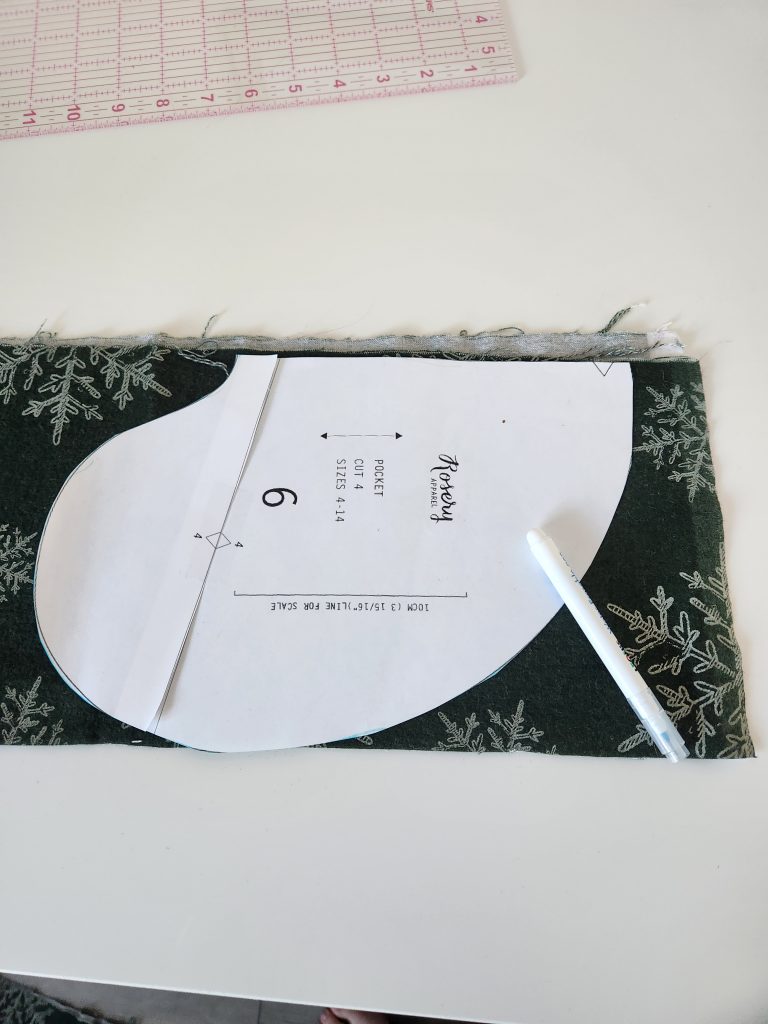
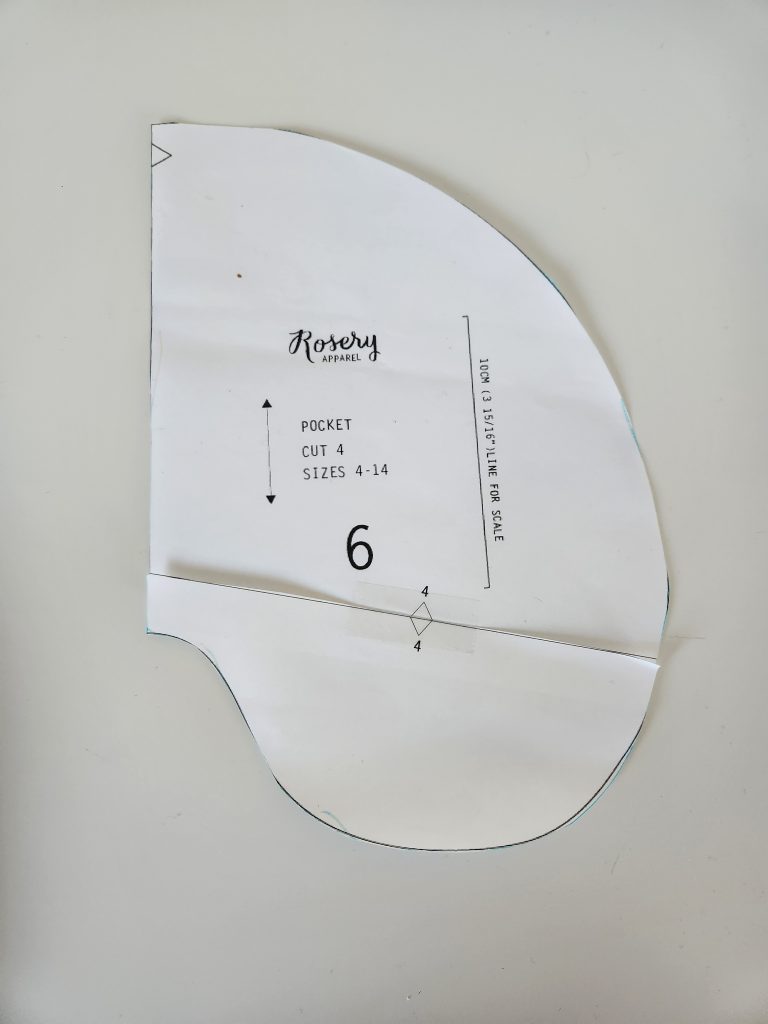
Once you have the pattern cut out and you go to cut your pattern out of your fabric, you’ll need to pay attention to the markings on each pattern piece.
First, each piece should tell you how many to cut out. Remember that your fabric is folded in half, so every piece you cut out will give you two of them.
Second, they should have a two-sided arrow printed somewhere on each of them. This is the grainline, and shows you which direction the grain of the fabric should be facing when you cut out the piece. Place the arrow parallel to any side of the fabric and it should be in line with the grain.
Third, the pieces may have a two-sided arrow with both points pointing at the same edge, or it may say “cut on the fold”.

Cutting fabric “on the fold” is a very common way to cut out symmetrical pattern pieces. Because clothing or other fabric constructions are usually symmetrical, most pieces are cut on the fold or on folded fabric. It’s also why it’s easiest to begin with ironing the fabric in half.
When you are cutting out a piece on the fold using a paper pattern, you’ll want to find the end with a line with two arrows pointing to the same edge or simply the words, “cut on the fold” or similar instructions on one edge. Line this edge up on the fold that you ironed into your fabric.
Before you get to cutting it out, however, place the rest of your paper patterns on the fabric so that you know you’ll have enough fabric and that they are all the direction they need to be facing.
To transfer the paper pattern onto the fabric, you have a few options. You can use an erasable marker or chalk to trace around it (my preferred method for beginners), you can cut around the paper while it’s pinned in place, or you can put pattern weights on it and cut around it. Whichever you choose, make sure you’re careful about not moving the piece while cutting it or your project won’t fit together right. This is definitely a skill that quickly gets better with practice, so don’t worry too much if your first (or second, or third…) project is a little wonky!
Here are some tips for cleanly cutting out fabric:
- Lay your fabric flat on a clean surface before starting.
- While cutting, use long, smooth strokes, not short sawing ones. Use the whole scissor blade.
- Move the scissors, not the fabric.
- Try to lift the fabric as little as possible while cutting.
- Take your time.
I hope you find cutting fabric as satisfying as I do!
- Pinning Pattern Pieces
Now that you have all of your pattern pieces, it’s time to assemble them!
It may seem obvious, but I thought I’d explain how to pin two pieces together to get you the best results.
When attaching two pieces of a garment or most other creations, you will almost always attach them right-sides-together. This means you line up the edges of the pieces you want to attach with their right sides/patterned sides/the sides you’d like on the outside of the garment touching each other. This will place the raw edges of the fabric inside the garment where they won’t be seen.
Then you’ll want to put pins into the fabric with the heads of the pins on the side that will be up while you sew. Place the pins through the fabric perpendicular to the edge you are sewing, with the points towards the edge, and use lots of them! Make sure you aren’t stretching or bunching up the fabric while you are pinning. I recommend using a sturdy flat surface while placing pattern pieces together.
While you are sewing the seam, take the pins out just before you get to them with the needle. Try not to sew over pins, as many people have broken needles and pins that way.
- Getting to Know and Setting Up Your Machine
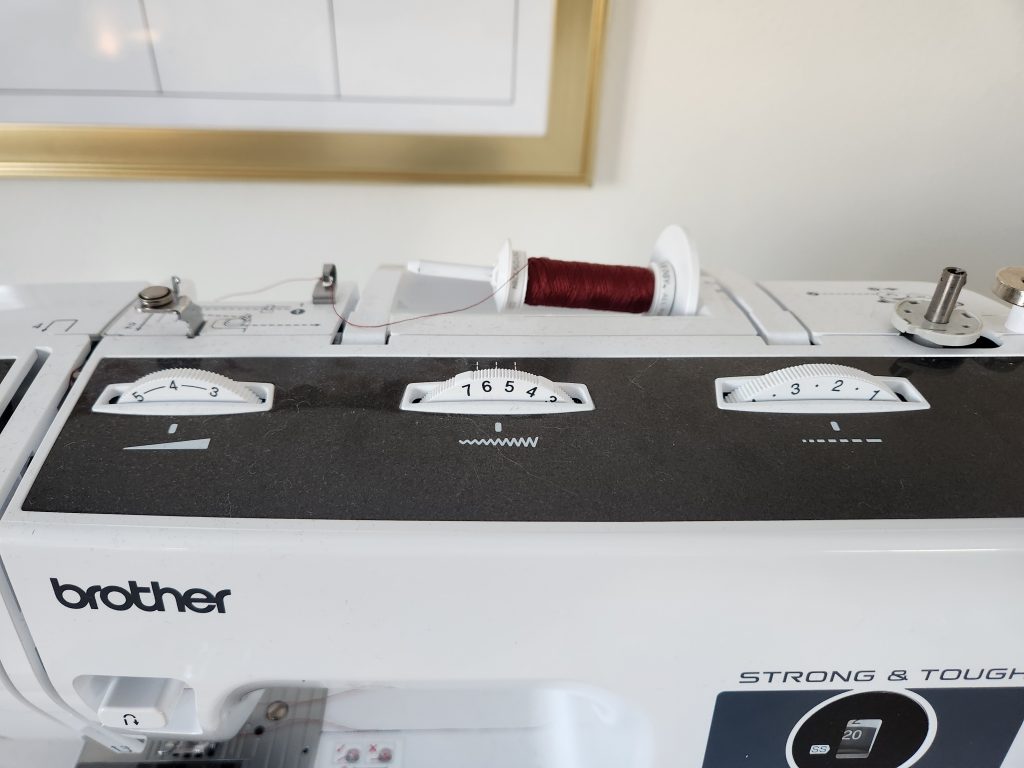
Sewing machines have a lot of switches, buttons, levers, and so on that can make them look overwhelming. Fortunately, you don’t need to be able to adjust every single one yourself to begin sewing! The above pictures show the most important functions of the sewing machine. Below, I’ll give you a quick explanation of each part and how you should adjust them to begin sewing.
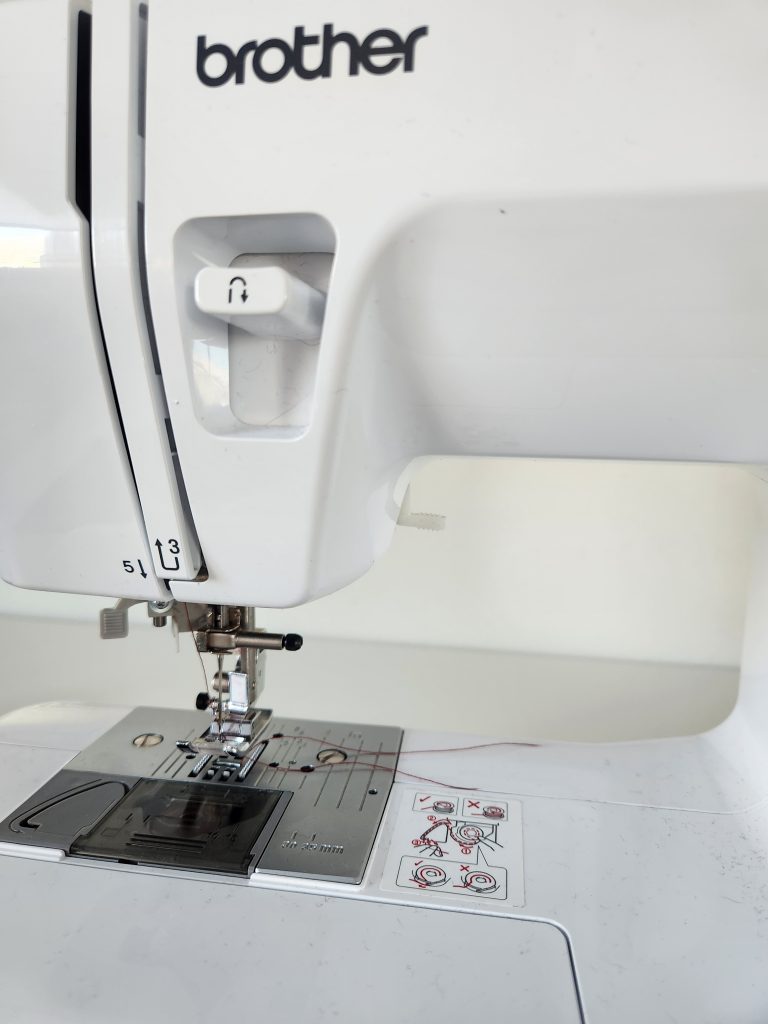
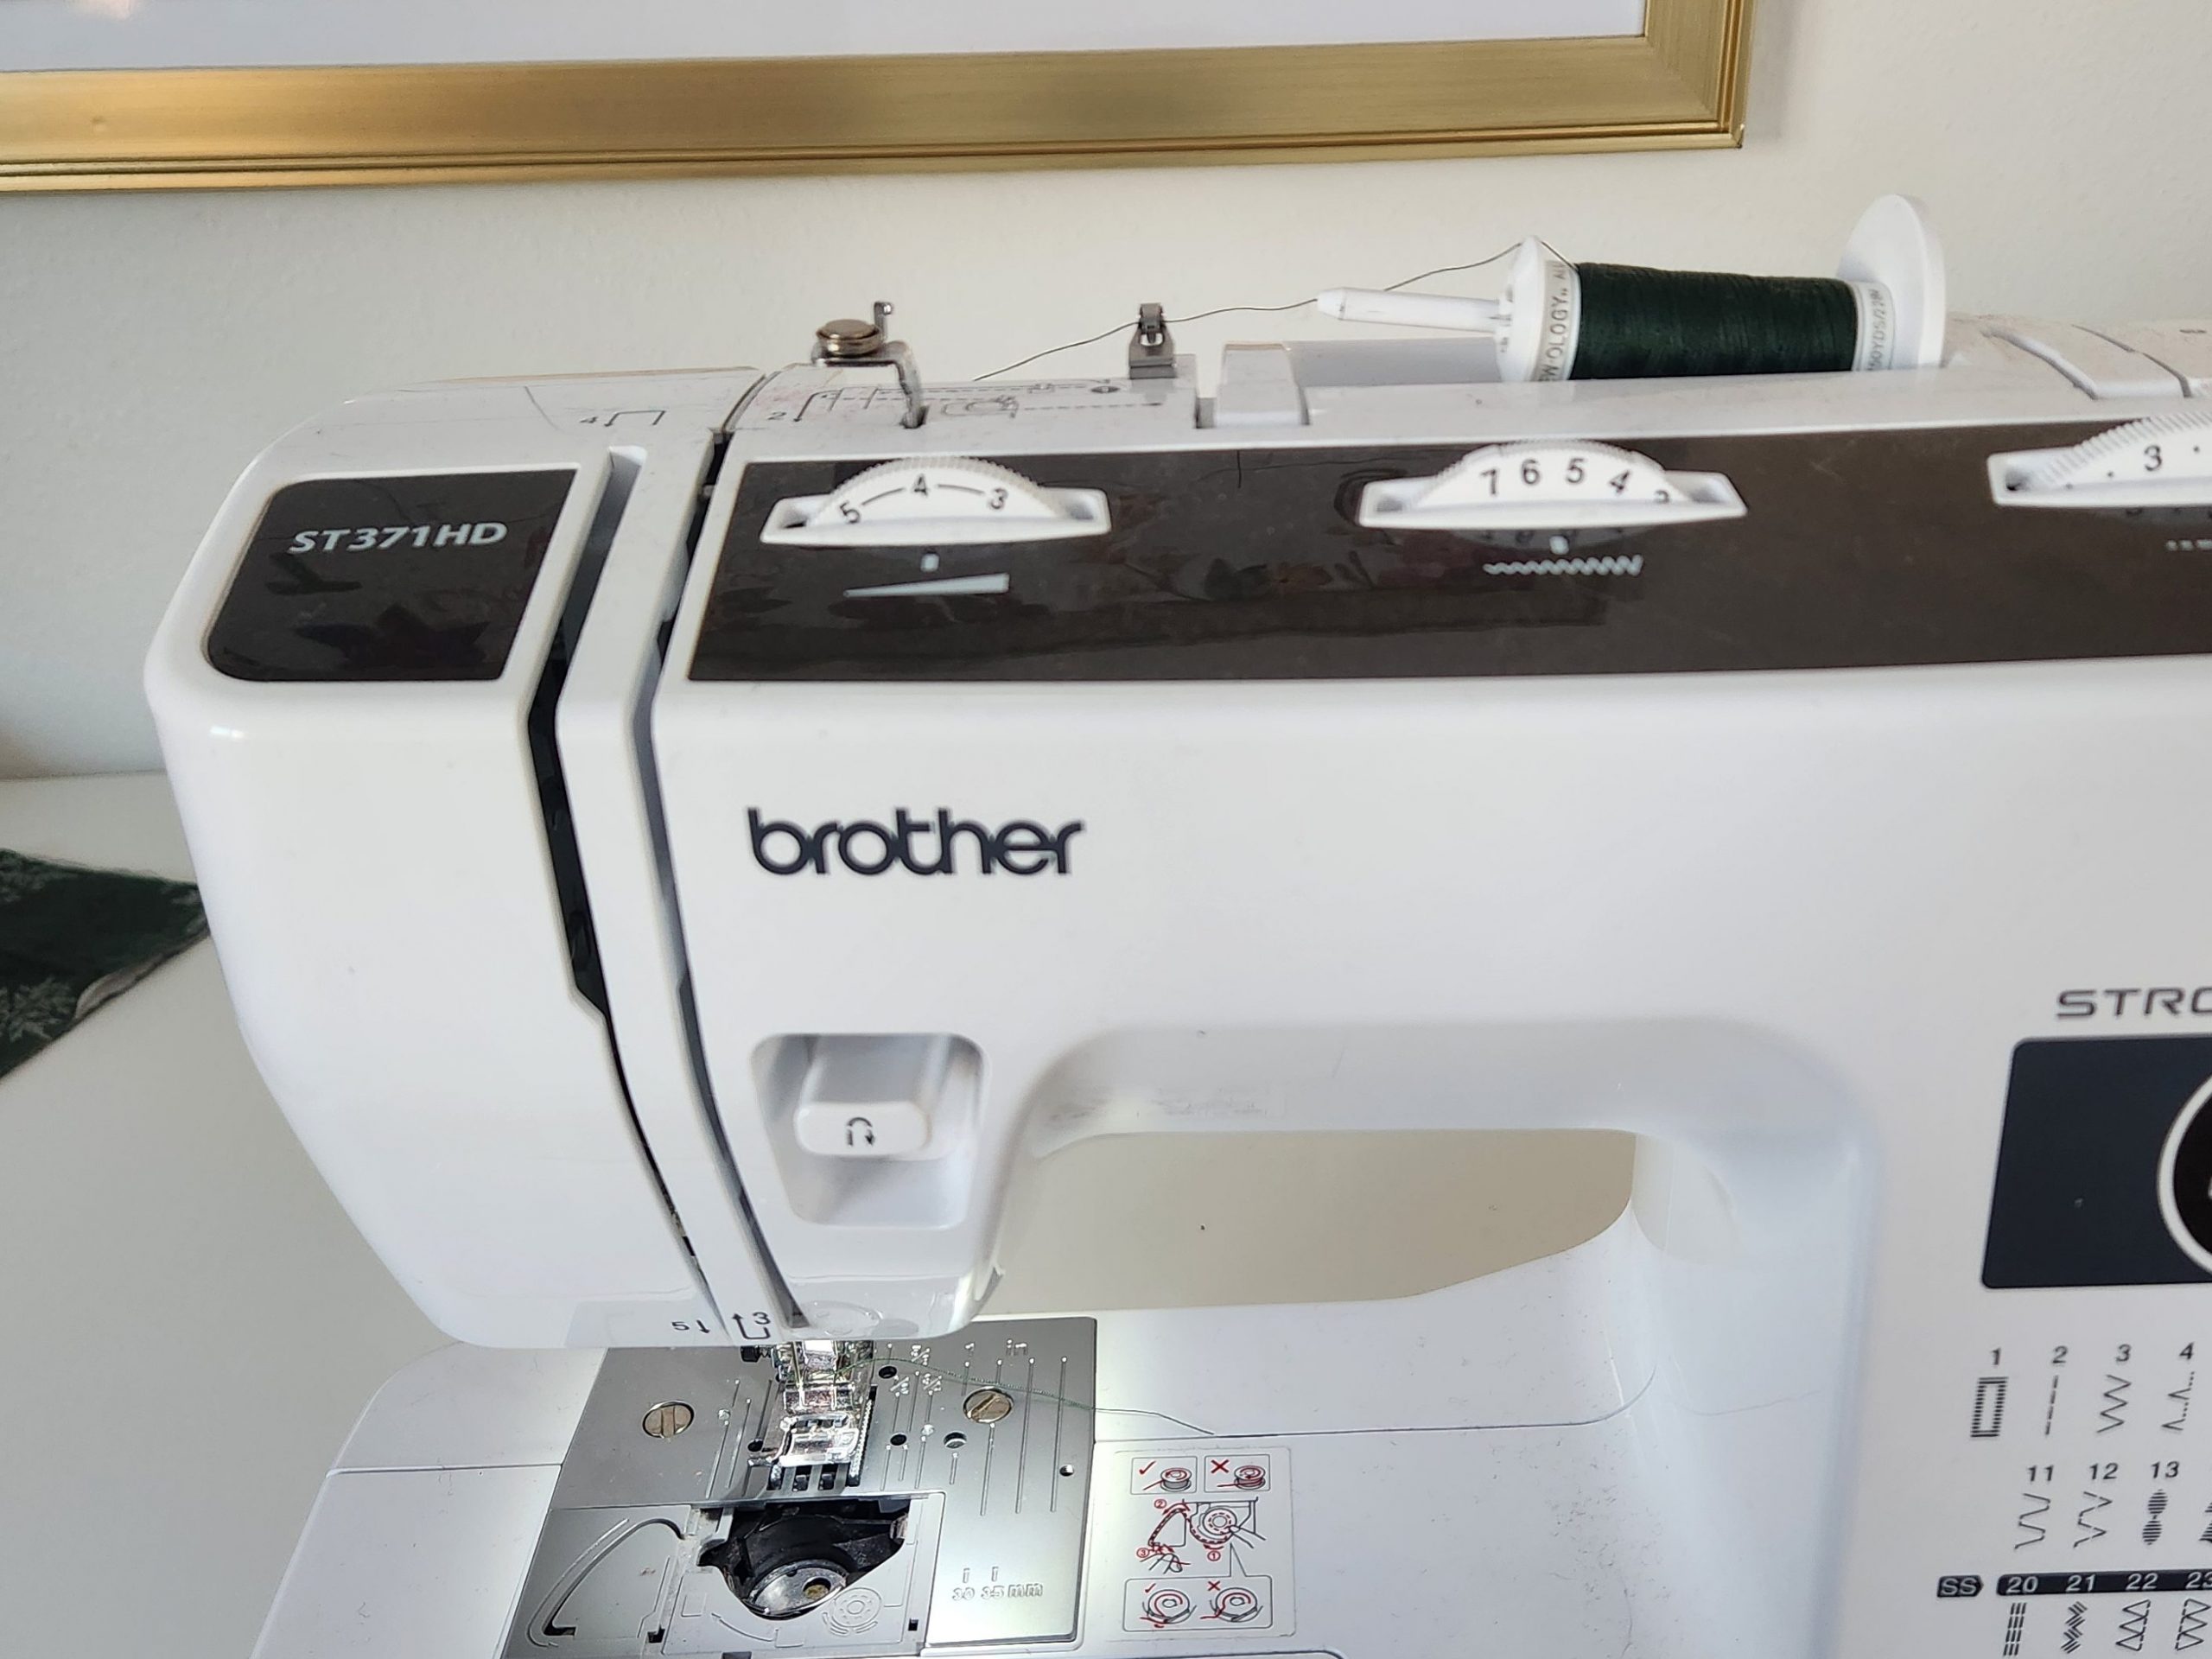
- Reverse and Presser Foot Levers
The reverse and presser foot levers are what you will be using the most when you sew. The presser foot lever is usually behind the arm of the machine. You’ll reach your hand through the hole in the middle of the machine to lift and lower the presser foot. The reverse lever or button is usually marked with a turned arrow, like the lever on my machine. This lever lets you sew backwards for backstitching.
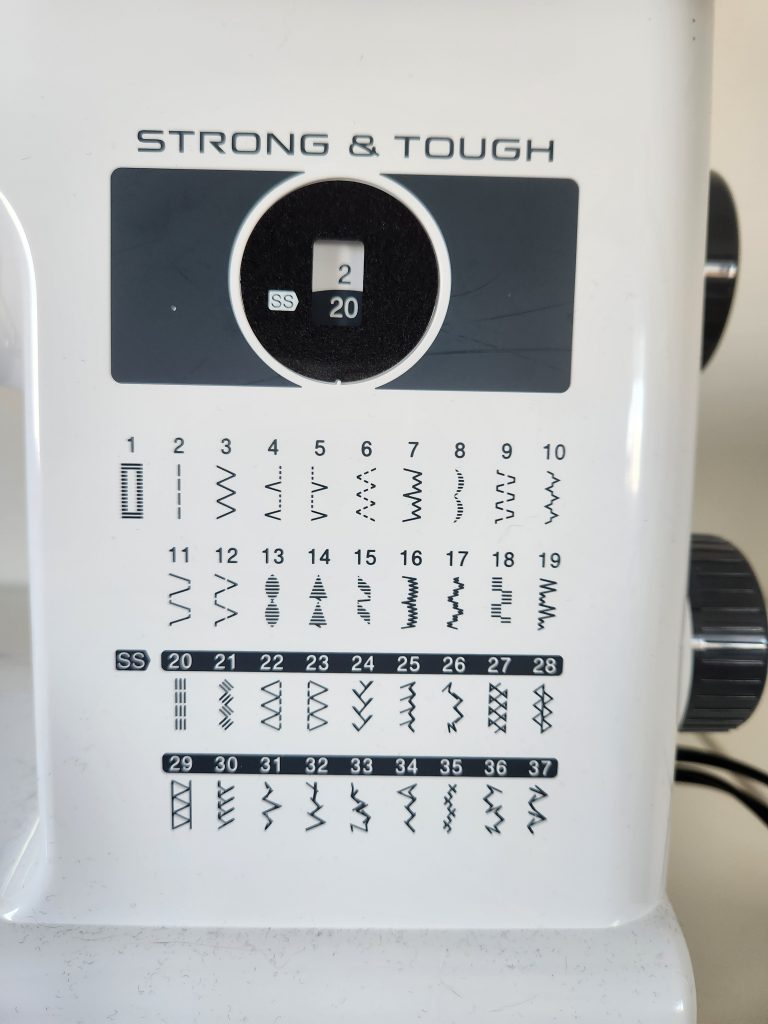
2. Stitch Selection
The second picture above shows my machine’s stitch selection. The diagram on the machine has pictures of what each stitch will look like and what number it correlates to. The window above it shows what stitch is selected, in this case stitch 2 or the straight stitch. The 20 below that is to show what stretch stitch option would be selected if my stitch length knob was turned all the way to the left.
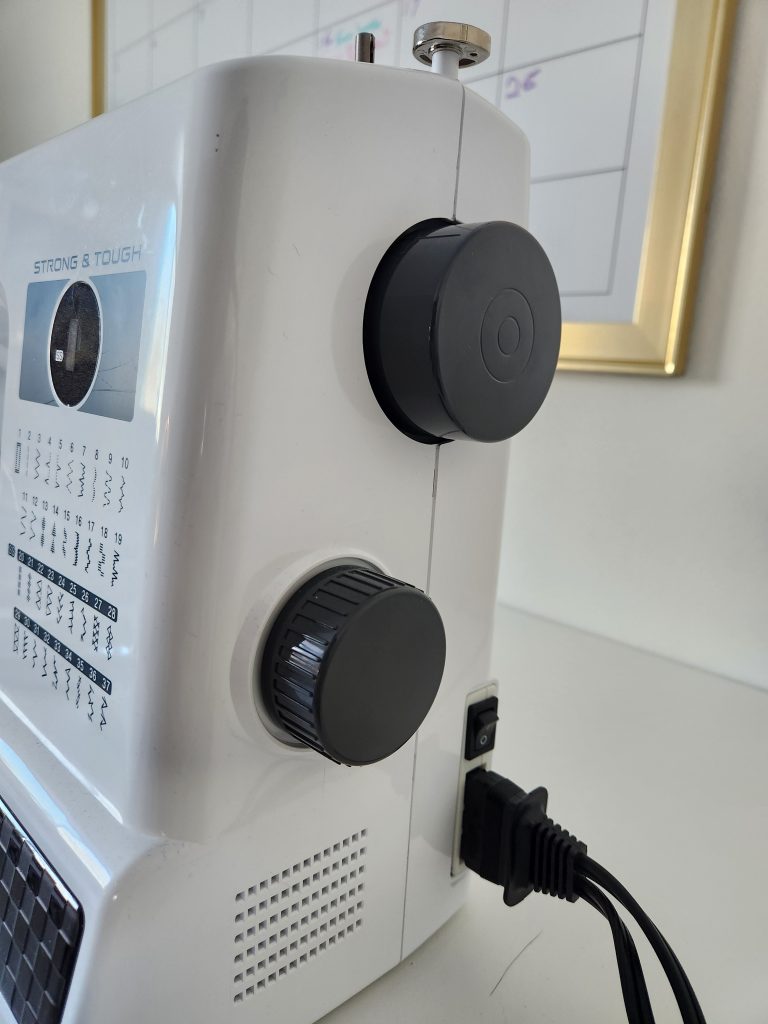
3. Stitch Selection and Manual Needle Knobs
The third picture shows the left side of my machine, which has a knob for moving the needle manually and a knob for selecting the stitch type. The manual needle knob will be used for releasing the needle from the fabric after sewing and various other things.
4. Stitch Adjustments
The last picture shows the stitch adjustment dials. On the left is the tension dial, for adjusting the thread tension. The middle dial is the stitch width and will be used to adjust where the needle sits in the presser foot and how wide stitches like the zig zag stitch are. On the right is the stitch length dial, which adjusts how long each stitch will be. On my machine, the length dial can also set the stitch type to stretch stitch.
To get you sewing as quickly as possible, set your machine to these adjustments: Tension – 4, Width – Move until the needle is as far left as possible, Length – 2.5.
After you get some practice, you can adjust these to your liking! There are many tutorials for adjusting the tension of your machine, but I’ve usually found that a tension somewhere in the middle does the trick just fine. I set the needle all the way to the left so that the right edge of the presser foot is 1 cm from the needle, making it easy to sew even seams!
5. Threading Your Machine
Getting the thread from your spool to the needle can seem like finding your way in the dark with your shoelaces tied together, but once you’ve done it once, it’ll be a piece of cake!
Start by putting your spool onto the spool pin on top of your machine. All of the machines I’ve worked with had pins that could pivot up to put the thread on and then laid back down while you sew. They also come with caps to put over the spool to keep it from sliding off. If your machine came with two sizes of spool cap like mine did, make sure you use the size closest to your spool size.
Oh boy, here comes the threading!
Don’t worry, most machines have diagrams showing where to hook the thread to get it through to the needle. It usually involves hooking it through a loop, then hooking it around a plastic bend, down under the bottom hook, back up, around an arm inside the machine, and back down to the needle. All of these steps are important, so make sure to look up a guide for your specific machine! Once you get it to the needle, you’ll need to thread the end through the eye of the needle and pull a good sized amount to the other side to keep it from slipping back out.
Now that you’ve done it, you’ll have to undo it to load the bobbin. But it should be easy next time, right?
6. Loading Your Bobbin
Bobbins are the short, plastic spools that fit into the bottom of your sewing machine. They come empty so that you can fill them with the thread you are using for your project and both the top and bottom stitches can match. Most modern machines have a quick and easy way to fill up bobbins for you.
On my machine, for example, I place the bobbin on the small pin on the right side of the machine, then take the thread from my spool through some hooks and tension loops, and thread it through the bobbin. Then I push the bobbin pin to the right and step on the foot pedal, and the machine fills the bobbin instead of moving the needle! These machines are pretty neat! Many machines also show you where to put the thread using images on the machine, but these can be confusing. If you have a different machine, try looking in the manual that came with it or looking up a video for your specific machine.
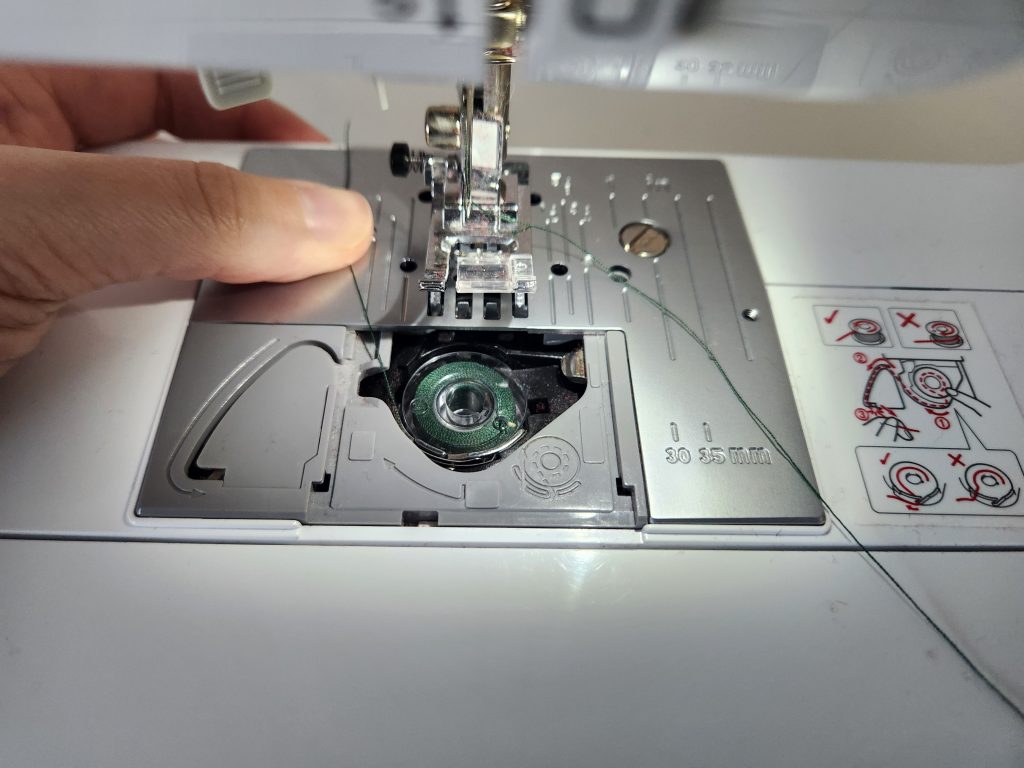
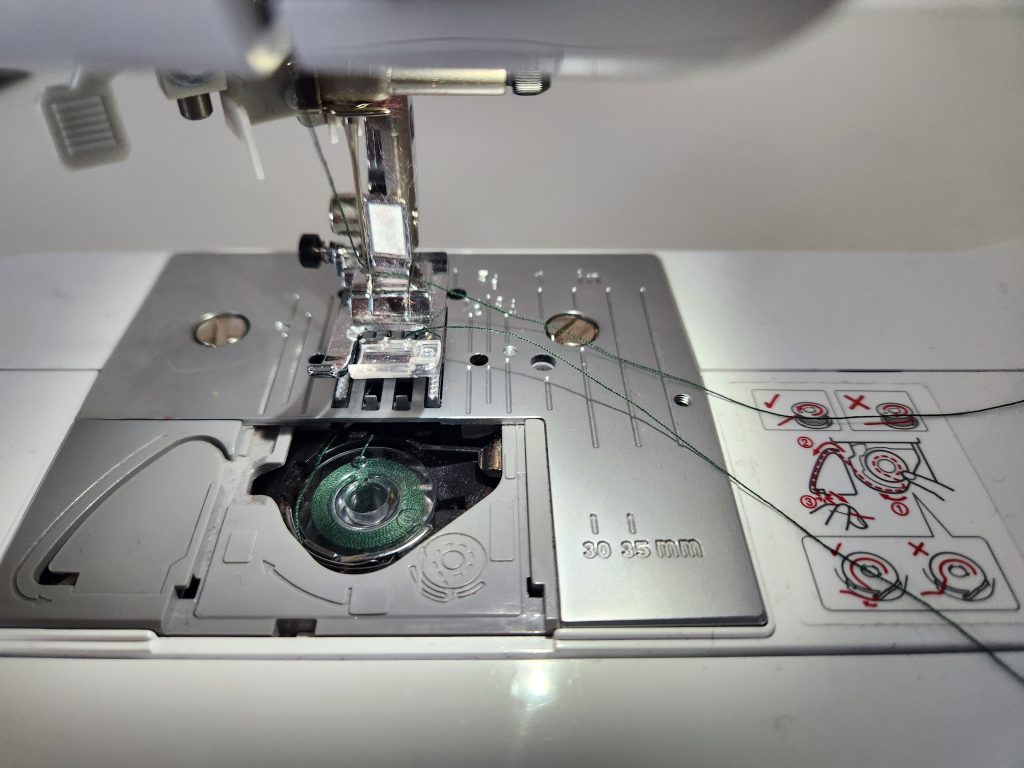
Once your bobbin is loaded, place it in the bobbin compartment and follow the instructions for threading the bobbin thread up to the face plate. This usually involves hooking it around a piece and then using the manual turn knob of your machine to bring the needle thread around the bobbin thread, grabbing it and pulling it to the surface.
When your machine is completely threaded, you should have one thread coming through the needle’s eye and one coming up through a hole underneath the needle. Make sure you have a couple inches of both sticking out when you start stitching.
- Basic Seam Construction with the Straight Stitch and Backstitch
Now for the straight stitch! The straight stitch is exactly what it sounds like: a straight line of stitches. It is usually the stitch that sewing machines are set to when you first get them, but to make sure just look at your stitch guide. My sewing machine has a window with a number that correlates to a picture for the stitch it is set to. For my machine, 1 is the buttonhole stitch and 2 is the straight stitch.
Once your machine is set to the right stitch and is threaded with both the top spool and the bobbin, you can sew a seam! Follow the instructions for pinning two pieces together above first so that you have something to sew.
Then, using the lever that lifts and lowers your presser foot, lift the foot. Use the manual turn knob to lift the needle. Place your project under the presser foot and line the right edge of your fabric up with the right side of the presser foot. Lower the presser foot onto the fabric.
While holding the two loose thread ends, lightly press on the foot pedal. You shouldn’t need to move the fabric yourself, as the machine should do it for you. Your machine should sew several straight stitches into your fabric!
Now to learn about the backstitch!
Backstitching is a technique used to anchor thread ends into the fabric you are sewing so that you don’t have to tie the ends of every seam yourself. To backstitch, simply sew forward and backward over a very small distance a few times. Using the reverse button on your machine to sew backward over the line of stitches you just made sews the thread into itself, keeping it from pulling out of the fabric. Now you can let go of the thread ends.
To keep going with the rest of the seam, simply press on the foot pedal and guide the fabric through the machine until it gets to the other end of the seam. Keep the edge of the fabric lined up with the right side of the presser foot to keep the seam allowance even. Remember to take pins out of the fabric just before you run them over so that you don’t damage your machine.
At the end of the seam, backstitch again to anchor the end in place. Then cut the threads to separate your project from the machine and you’re done! The side with the edges of fabric (the seam allowance) is the inside, and the side with the ditch between the fabrics is the outside.
- Easy Faux Serging Technique
If you sew a seam and don’t “finish” it, the edges of the seam allowance will likely fray and unravel and generally cause an uncomfortable mess on the inside of your clothing or other creation. There are many ways to finish seams so that they won’t do this, but the easiest one for beginners is faux serging/faux overlocking. Real sergers/overlockers use several needles and several spools of thread to encase the seam allowances in thread to keep them from unraveling. We can imitate this effect with our sewing machine’s zigzag stitch!
Set your machine to a zigzag stitch (on my machine it’s 3), set your stitch width as wide as it will go, and set the length to a very short setting, somewhere between 1 and 0.
Set the seam allowance of your seam under the presser foot, so that the edge is right in the middle of your presser foot. When you sew the zigzag stitch like this, it should wrap the edge of the fabric in thread while sewing the left side of it. This will keep the edge from unraveling!
Since most serged edges will be sewn into a seam, sometimes you don’t need to backstitch for this technique, but I usually do anyway.
- Pressing Seams
Most patterns will include instructions about which direction to press seams. This helps your seam allowances lay flat and gives the best appearance to the outside of each seam.
To press a seam that you have sewn, start by heating up your iron to the correct setting for your fabric and preparing your ironing board. Lay your project flat on the ironing board with your seam allowance up. Holding one side of the project with your free hand, place the hot iron next to the seam allowance.
While you hold the project as taut as you can, run the iron over the seam allowance, pressing it to the side. Once the seam is all pressed, turn your project right side up. Press the seam again while holding it taut, using the nose of your iron to blend the seam. Make sure the seam allowance is not being folded or pressed to the other side while you iron the front. The goal is a seam you can barely see.
If the instructions for your project say to iron a seam allowance to the inside, this means to iron them towards the middle of the project. Ironing to the outside means towards the edges, and if it says to iron the seam allowance open, that means to spread the two sides of the seam allowance and then iron them in opposite directions.
If you need to iron a seam allowance open, simply follow the instructions above but start at the end of the seam, place the nose of the iron in between the seam allowances, and press it from one end of the seam to the other.
- Sewing Darts
Sewing darts is a technique used to add shape and fitting to woven fabric clothing, particularly in shirts, the bodices of dresses, and the waists of pants. It’s a simple and useful technique that you’ll be mastering in no time!
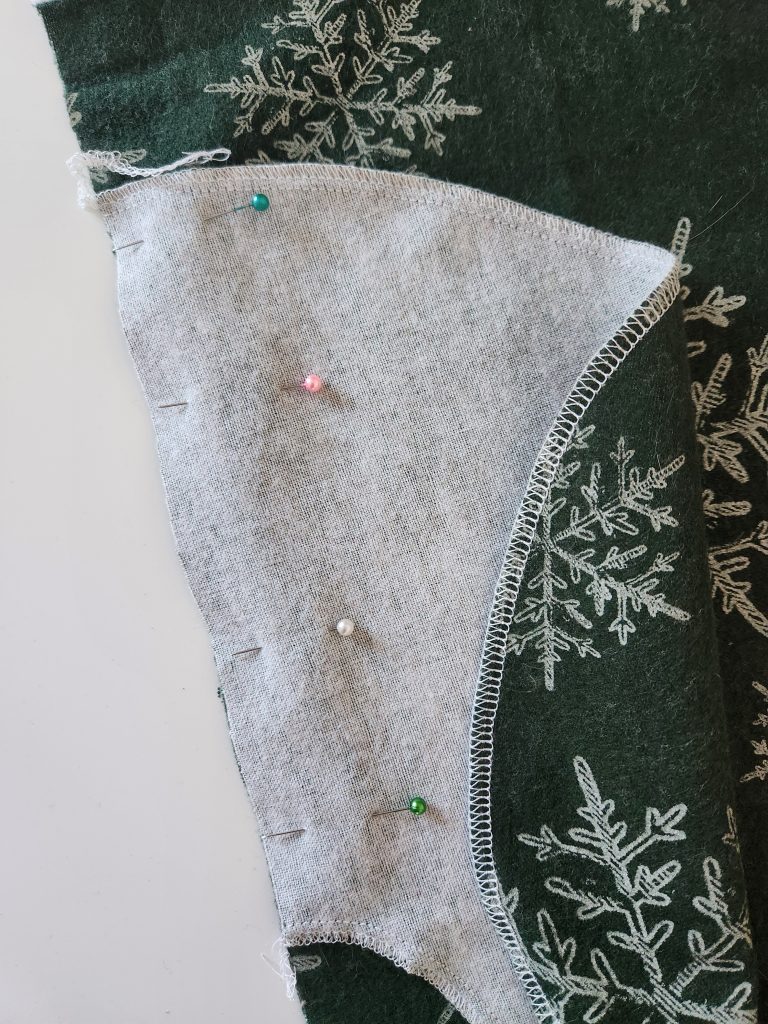
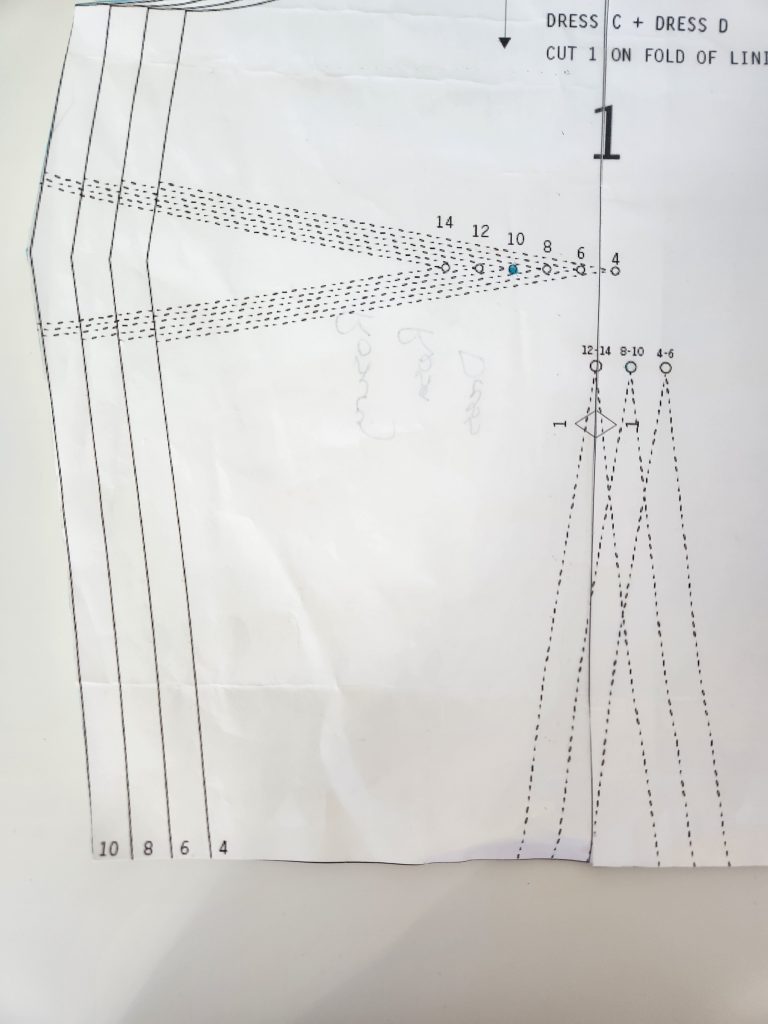
Patterns that have darts will mark them with a dot and dashed lines that form a triangle, like this image above. Transfer the markings to the wrong side of your pattern pieces with an erasable marker.
Next, pull the two sides of the triangle together with the fabric folding towards the wrong side of the piece, folding the fabric in half. Put a pin through the point where the two sides meet.
Now find the point of the triangle. make sure the point is right on the fold you just made and pin it into place.
Take the project to your sewing machine and begin at the edge of your fabric. Backstitch right onto the end of the line you drew for the dart leg, then sew up the line. At first, you can just follow the line all the way to the dart point. Don’t backstitch at the point! Instead cut the threads long enough that you can tie them into a double knot.
Once you get experience sewing some darts, you can improve the quality of your darts by adjusting your method. Instead of sewing right up the dart leg, sew it a little short so that you get to the fold a little before the dart point. Then curve towards the dart point and sew as close to the edge as you can for a centimeter or so. This gives the outside of the dart a nicer appearance!
Once you’ve sewn your darts, press them with your iron. Most of the time you’ll press them towards the center of your work if they are vertical or towards the bottom of your work if they are horizontal.
- Gathering Fabric

Gathering fabric is simple and useful skill for making clothes! It refers to the use of a gathering or basting stitch for bunching fabric up in a consistent way. It is commonly used on skirt waistlines, sleeves, and decorative details.
To make gathering easy and consistent, we will be sewing two gathering lines. Set your machine’s stitch length as long as it will go. Then sew a line of stitches across the edge you want to gather without back stitching on either end. Make sure you leave a few inches of extra thread on each side.
Now sew a second line of stitches next to the first. Keep it consistent by lining up the previous line of stitches with the side of the presser foot. Again, don’t backstitch on either side and leave a lot of extra thread.
Once both lines are done, grab both of the loose threads on one side of the wrong side of your fabric. Using your other hand, pull the fabric down the threads so that it bunches up. Pull the bunches further down the threads and continue bunching the fabric using the threads.
Adjust the fabric along the threads to even it out. Gather the fabric along the other side as well to give it a consistent gather.
Once the edge of the piece matches whatever you are sewing it to, it’s time to sew the gathered piece to the rest of your project. Make sure to set your stitch length back to 2.5 before sewing this seam! You can adjust the edges while you are pinning to get them to match up. To get the best gathered effect, sew this seam in between your two gathering stitches.
Once the pieces are sewn together, there should be no fear of the gathering changing or slipping around. Using your seam ripper, pull out the gathering stitches that show on the right side of your project. Now you have a gathered effect on your project!
- Hemming
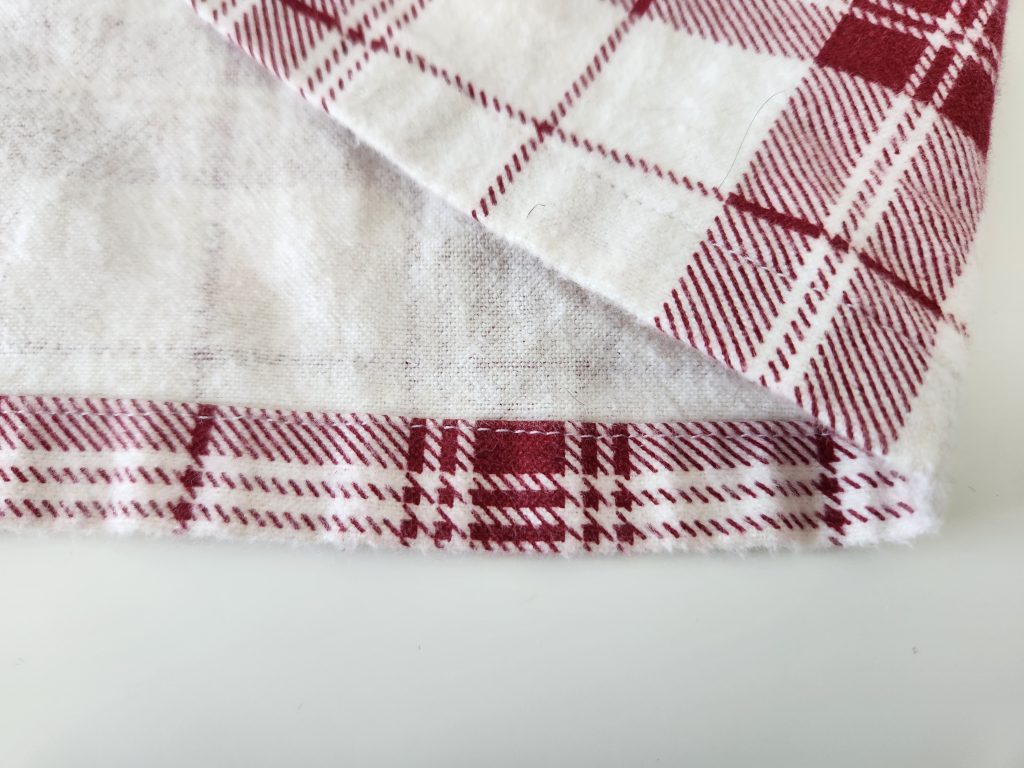
Hemming is the last essential skill we’ll talk about here. It is the finishing of the edge of a piece of clothing, such as the bottom edge of dresses, pant legs, or shirts. There are lots of ways to hem, but we’ll only talk about the simplest, the double fold hem.
Used to encase the raw edge of the fabric and provide a finished look to a garment, double fold hems are simple and easy to make. First, start by folding the bottom edge of what you are hemming to the wrong side of the garment by 1 cm or 1/2 inch. Iron this fold into place.
Then, fold the new edge up by the same amount and iron again. This should give you a clean edge without any raw fabric edges showing. After you’ve ironed it, pin the edge into place to keep it from unfolding while you sew.
Now sew the folded edge into place by sewing along the inside folded edge. You should be able to line the fabric up with the right side of your presser foot to give you a nice, consistent hemline all the way around the hem!
Putting It All Together
Time to put all you’ve learned together! In this section, I’ll describe where you can go from here.
What to Sew?
There are many ways to decide what to sew. You can look up paper patterns, use measurement based patterns, and of course make up your own patterns!
- Paper Patterns
Paper patterns are an excellent place for beginners to start. They include instructions, pattern pieces to help you cut out the fabric, and sizing guides. I recommend finding a pattern by a small designer who writes in your most comfortable language for your first project. These tend to be easier to understand and include less advanced techniques.
My personal favorite pattern designer is Janelle at Rosery Apparel – https://www.roseryapparel.com/
She makes an awesome YouTube channel that includes tutorials for making her patterns. I love how calm and beautiful her videos are! Many of the clothes I’ve made were her patterns or inspired by them. Her patterns are easy to follow and make beautiful clothing. You can also print them yourself so you can start immediately!
You can also start with patterns by big companies like Simplicity. They are easy to find and reasonably priced, but I’ve found them to be confusing for beginners. My first project was a paper pattern by a big company, and it took me a long time to understand most of the instructions. I never finished it because I made too many mistakes, but it was also a great learning experience!
2. Measurement Patterns
Measurement based patterns are another option. To make one, you simply follow the instructions for measuring your body and using those measurements to make pattern pieces. There is a lot less paper cutting involved, and they fit better because they are made with your measurements.
To help you get through your first sewing pattern experience, I’m currently making a total beginner gathered skirt measurement pattern! I hope that you will join me in making a cute gathered skirt when I get it posted!
3. Make Your Own
Another option is to make up your own patterns! I don’t recommend this for beginners, but it is an excellent way to learn why patterns work like they do. Once you have some experience, try making something by yourself! Don’t be afraid to fail. That’s the best way to learn!

Hi, neighbor!
I’ve been drawing, painting, sculpting, and gaming since I was a little kid, and I love finding new arts and games to try! I want to help you experience the benefits of arts and crafts too, so I decided to make this website and share everything I make. My dream is to make these posts as accessible as possible so that more gamers (and non-gamers too!) can enjoy crafting! I would love to hear what you think or what you make, so please leave a comment above with your own makes, questions, and comments. Thank you for stopping by!
~ Elli
Leave a Reply